DIY Camper Conversion – The Ultimate Self-Contained Mazda BT-50
When a retired boat builder with incredible attention to detail and obvious Tetris skills sets about to build his own camper conversion, the result is stunning. Camper conversions are a fantastic touring option for travelers who have no interest in…
When a retired boat builder with incredible attention to detail and obvious Tetris skills sets about to build his own camper conversion, the result is stunning.
Camper conversions are a fantastic touring option for travelers who have no interest in towing a trailer of any description. Let’s face it, they are a hindrance especially if you want to tour the more remote areas that require off-road ability to get to. But, like everything, there are compromises to be made especially when trying to fit all your gear and life’s necessities in the back of a ute. Unless you have the funds to deck out a large American pickup truck, you will be pushing the limits of any of the popular utes available in Australia.
This is the problem that faced Ken Blacklock when he was designing and building his own camper conversion. A retired boat builder, Ken had considerable experience in building and fabrication but he also had enough engineering knowledge to know the potential pitfalls of putting too much weight into the back of a dual cab ute. If you want to know more about this problem, have a read of our article about bent dual-cab utes.
Ken told RV Daily, “The vision I had in my mind was to make the canopy as compact as possible, to reduce wind drag while making it large and roomy. Problem is, if you look online, you can find many pictures of dual-cabs with large overhangs and broken chassis. Our design would have resulted in too much weight behind the rear axle. I could not use my previous vehicle so I bought a single cab chassis model for the build.”
The canopy is a fine balance between practicality and size constraints. Everything had to be designed to fit all Ken’s equipment from the outset. It’s a very bespoke result.
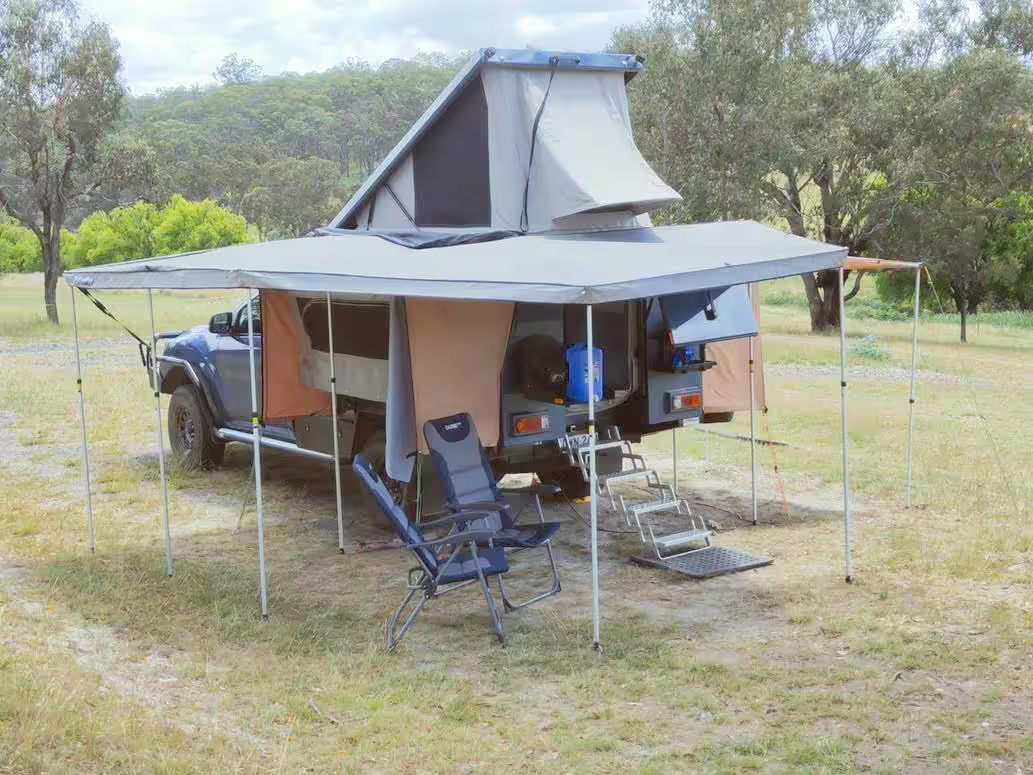
Ken’s idea was certainly ambitious, even using a single cab ute as the base vehicle. Further, finding similar projects to draw inspiration from was hard to come by, as Ken explained, “My idea was a five-door canopy with smaller doors at the front, left-hand side for the kitchen and right-hand side for storage and second spare wheel. Two larger doors would open to reveal the beds and entry into the cabin would be through a rear door. As we all do these days I got onto the “interweb” to see if I could get some ideas. I wanted two single beds and every canopy or variation of a canopy I saw was based on a double bed. These were usually mounted high on the vehicle or above the cab and required a ladder to climb up into. Even after extensive searching, I could not find anything like what I had in mind. So I had to go it alone and come up with a new concept.”
Getting started:
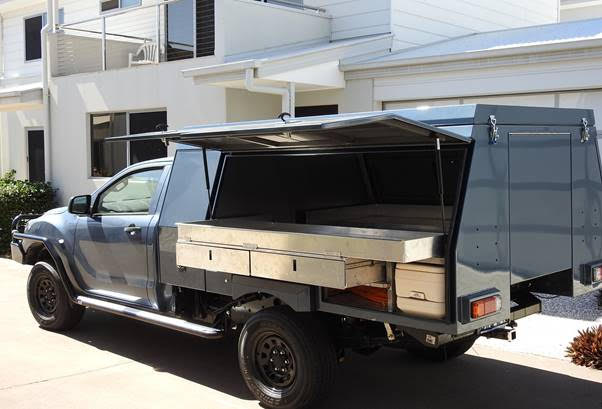
“First thing I had to do was decide on floor plan size. The aluminium tray, that South Coast Mazda had conveniently put on the vehicle, measured 2.6m x 1.85m so they were the dimensions I decided to stick to. Next was to determine the height of the canopy so that it would fit into my garage. The opening height of the door is 2.35m. The problem was the driveway rises up to the garage floor which would raise the height of the back of the canopy as I drove in. I had to calculate the rise taking into account the fact I was intending to lift the suspension on the vehicle, then allow for the weight of the canopy which would bring the height down again. As a matter of interest, I came within 15mm of my calculated finished height which I was very happy with allowing for the number of assumptions I had to make.”
Coming up with a concept and basic design plan was just the beginning of the challenge for Ken. Now he had to build it.
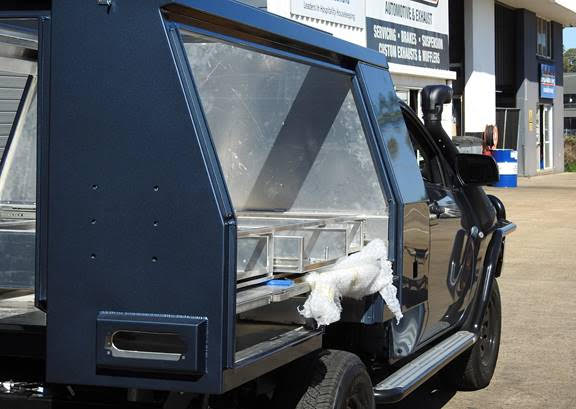
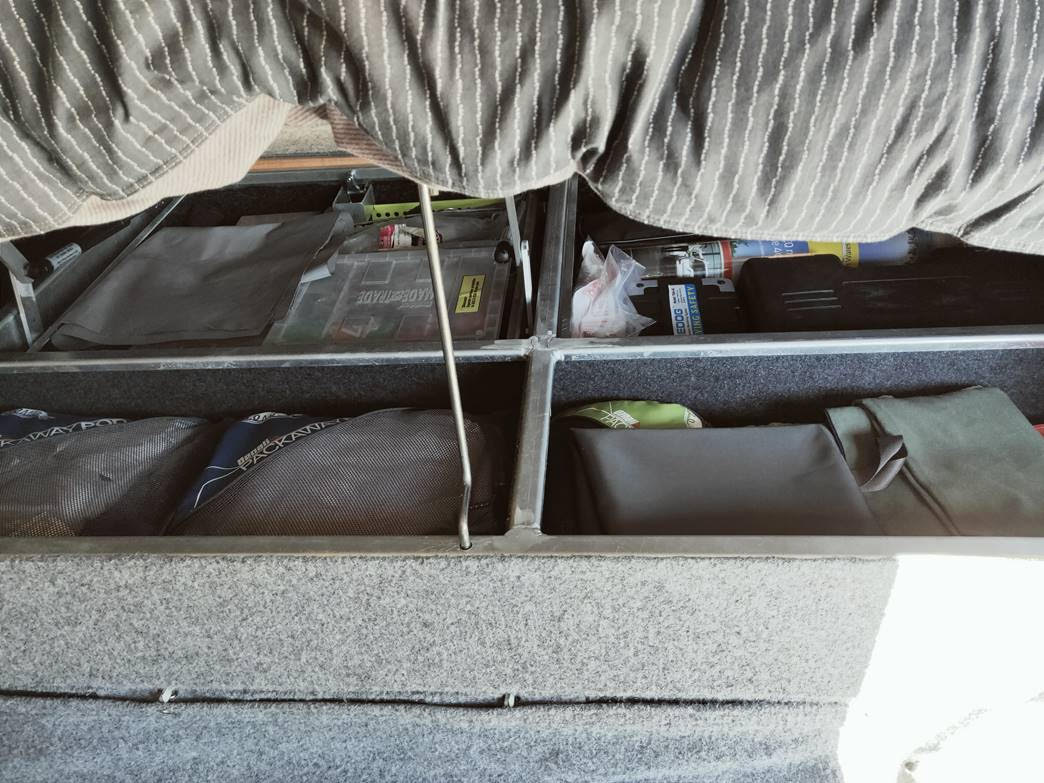
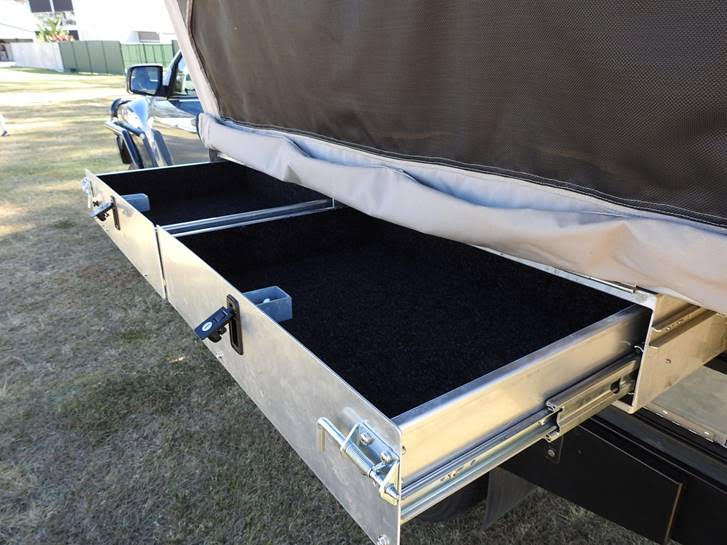
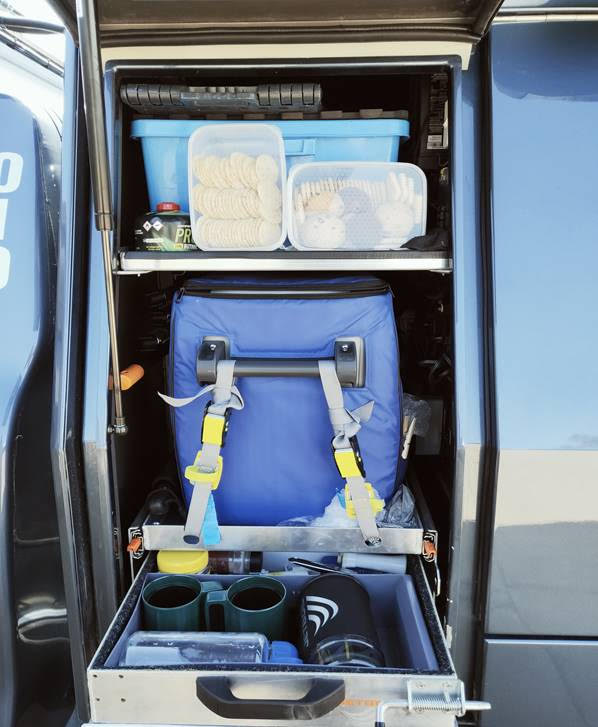
Ken has been very clever to utilise every cubic inch of available space for storage.
“Being a concept that existed only in my head I needed to be intimately involved in the construction. Fortunately, from my previous occupation, I had contacts, and one of those was a metal fabrication shop, Metal Master, with whom I had dealt for over twenty-five years and had a very good relationship. I told them what I intended to do and how I intended to do it so they offered to assign their leading hand to assist me and he and I would build the canopy. As a result of this arrangement, I had access to guillotines, folders, high-pressure water cutters, and someone who could weld stainless steel and aluminum.”
“From research, I had read that many aluminium canopies can crack at the seams. I came across an aluminium canopy maker in Dubbo, NSW who solved this problem by first building a steel frame or skeleton and gluing the aluminium panels to the frame with a high-strength flexible adhesive sealant. From my boat-building days, I was familiar with the use and application of these adhesives.”
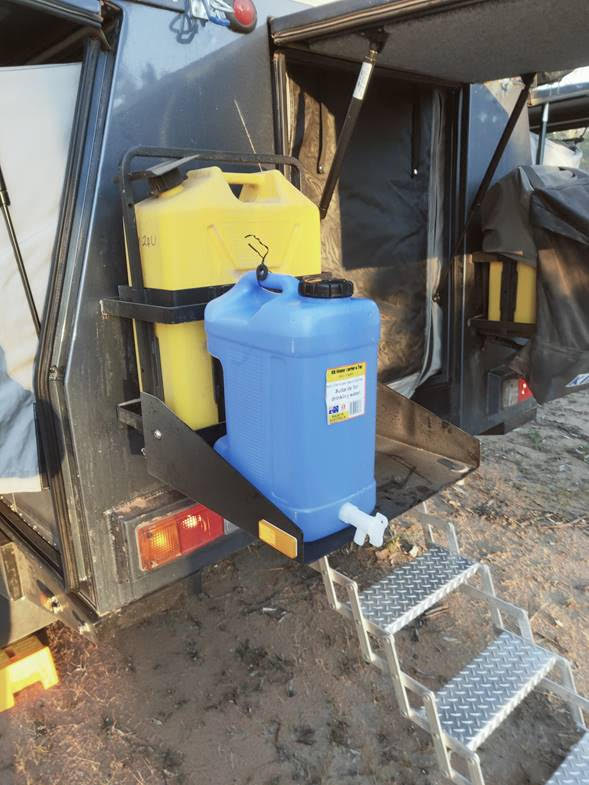
In an effort to avoid a broken chassis, Ken designed a frame for the canopy with a strong trussed backbone that would distribute the weight over five mounts on the vehicle chassis. Ken added, “A lot of pre-planning had to go into the design to accommodate everything that would be added at a later date including jerry can holders and where awning brackets would attach.”
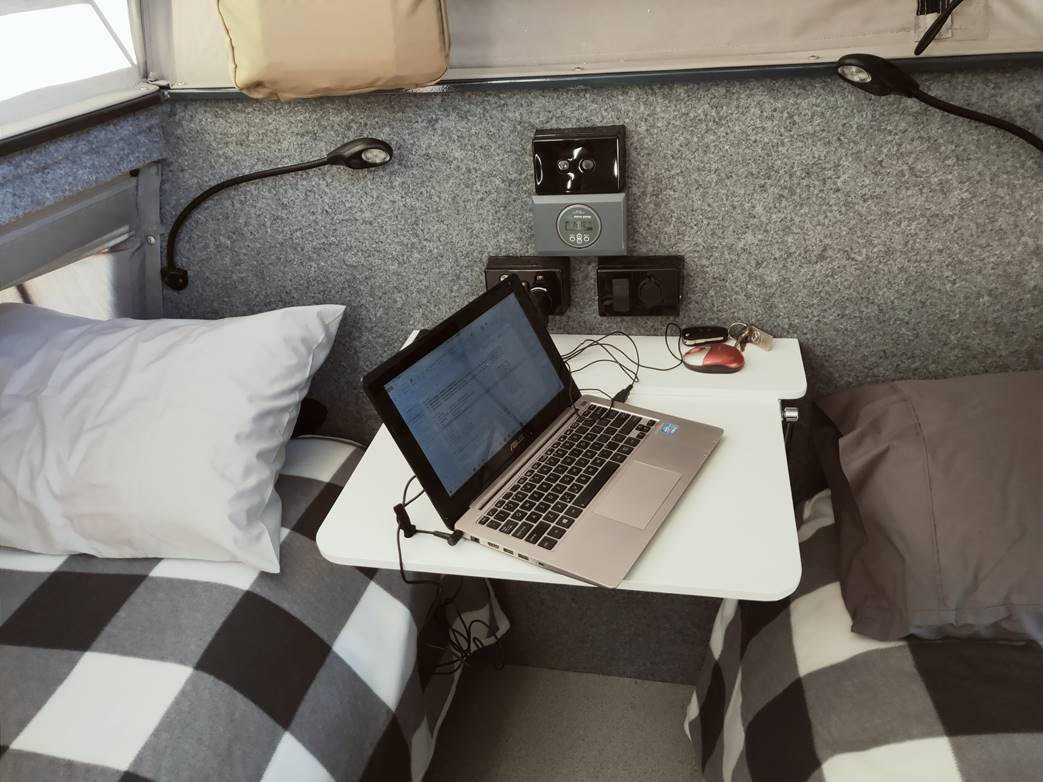
When the canopy is fully opened and the beds pushed out, there is a surprising amount of interior living space. All electrical conveniences are provided as well.
While all this was happening Ken had the Mazda at ARB where it received a total suspension upgrade including heavy-duty springs with adjustable shock absorbers and a 60mm lift. Also added were a long-range fuel tank, bullbar, side protection bars, a Carbon heavy-duty 12000lb winch, snorkel, and an additional fuel filter. The standard wheels did not fit the overall appearance so they were replaced with black rims and shod with Toyo Open Country All-Terrain light truck off-road tyres.
Fitting all the good stuff:
The next step was to install all the electrical wiring and, again, Ken’s previous experience would come in handy. As he explained, “In my boat building days, I learned how to wire 12-volt systems and still had rolls of cables, the necessary fittings, and tools to do the job. I installed a 100amp hour lithium battery, a DC to DC battery charger plus all the lighting, switching, power outlets, onboard air compressor, and a 240-volt inverter.” In a smart move, Ken had all his electrical work checked by an auto electrician to make sure he’d wired up everything properly and safely.
With the extra weight, it was necessary to get a GVM upgrade to 3.5t with the correct engineering certificates. To help bring the vehicle to a halt, the standard rear drum brakes were replaced with disk brakes. Ken also fitted a single Rhino roof bar to the cab on which is mounted a 40” light bar (that Ken reckons turns night into day), a fold-down aerial for the GME UHF radio, and the mount for a sand flag.
Everywhere you look, there are nice little touches such as the retractable stairs, the fold-down table over the jerry can holder, the drawer under the fridge and the pole holders on the front wall of the canopy. Ken’s attention to detail is extraordinary.
In spite of Ken’s efforts to keep the weight of the vehicle down, fully loaded the Mazda did struggle going up hills. After a lot of research, Ken decided to have the engine ECU remapped. Ken explains, “The tune is called Touring and Towing and was carried out by Performance Diesel Tune Gold Coast. It was expensive but the difference it has made has been outstanding. We achieved an average of 22% more power and torque but, more importantly, 47% more torque is available when the vehicle is moving at 90kph which is perfect for safe overtaking. Surprisingly we also achieved considerably better fuel consumption after the tune. The car is now a real pleasure to drive.”
Proof is in the pudding:
If you’re wondering how all this works in the real world, Ken explained, even in the coldest weather, the interior is surprisingly warm given the canvas sides. This is attributed to the lift-up roof being insulated with two 12mm layers of closed-cell foam and the ceiling isolated from the frame by 6mm foam strips. The doors over the bed canvas also add another layer of protection. Ken had the foresight to install curtains that fit around the outside of the bed canvas for when camping in very inclement weather. The bed trays are lined with carpet and the innerspring mattresses stop rising cold.
Ken had a lot of praise for the Supa Wing Awning he fitted and was thankful to the team at Supa Peg for all their assistance in getting the awning fitted and working just right. It certainly looks good and extends the undercover living area considerably.
For cooking, Ken utilises a single 1.25kg gas bottle with a single burner gas ring. He also uses a Jet Boil for boiling water and, according to Ken, if you haven’t got one of these, get one as they are brilliant. “It will boil half a litre of water in two minutes.” Ken also fitted a fold-down fire pit which he modified to double as a sand anchor in case of emergencies. Seriously, how clever is that?
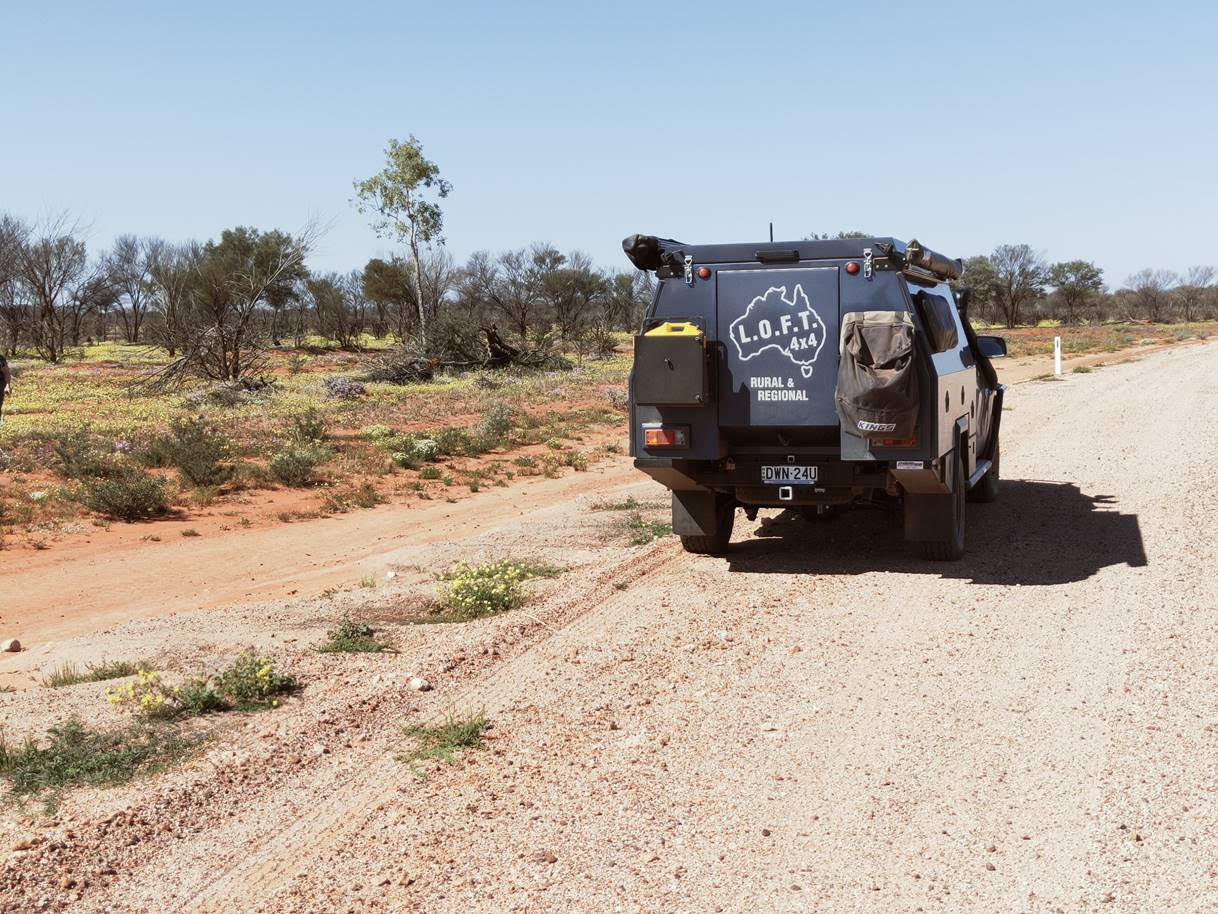
Ken’s BT-50 custom camper is designed for touring in the Aussie outback.
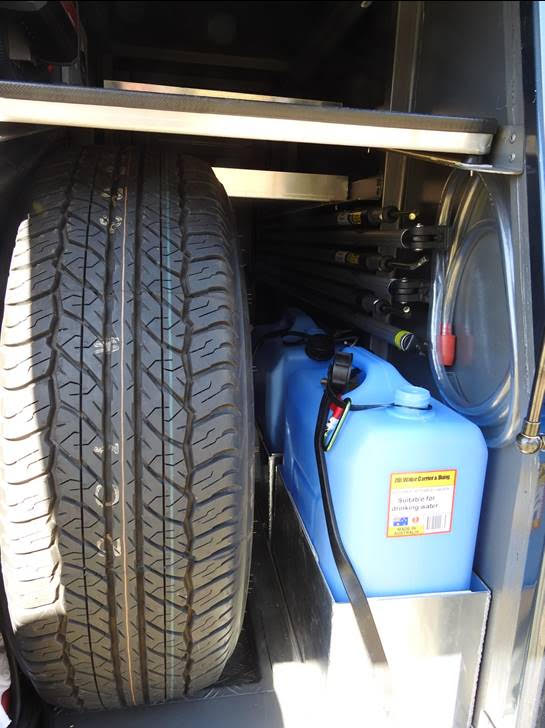
For day-to-day water, there’s a 5-litre container which is located on the back fold-down table. It is refilled from one of two 25-litre water containers using a simple syphon. If that doesn’t sound like enough, Ken also carries 4 x 5-litre containers and, if travelling in more remote areas, he simply carries more containers. “I prefer multiple water containers rather than one larger water tank to reduce the risk of contamination.”
Ken told RV Daily the build process took him nine months all up. Given this was an entirely new design, that is a remarkable effort and, I’m sure you’ll agree, the finished product is equally impressive. It is obvious Ken has put a lot of thought into the camper to ensure it is comfortable and capable of the self-sustained, remote area style of travel he enjoys.
Well done Ken. We here at RV Daily are suitably impressed with your work.
Safe travels.
If you have a custom built RV of any size that you would like to share with the nation, please drop us a line at SayHello@RVDaily.com.au