How to replace the anode in your RV hot water system
Having a hot water system in your caravan is usually an on-demand luxury that makes time in the van more home-like. Here’s how to replace the anode in your RV hot water system There are several established suppliers to the…
Having a hot water system in your caravan is usually an on-demand luxury that makes time in the van more home-like. Here’s how to replace the anode in your RV hot water system
There are several established suppliers to the RV market for hot water systems (HWS) and Suburban is the main one that concerns us here. Because despite having a mechanical routine that most other RV systems don’t, the Suburban is widespread in its Australian fitment (see footnote). Maintaining the system is a simple affair but one that’s often ignored … until … the system lets us down, but more often than not it’s one item that plays a crucial role. And that’s the anode. The what?
The anode is a sacrificial part installed in steel hot water tanks designed to prolong the life of your tank by its own demise. You see, the anode is usually made of magnesium and is designed to offer what’s called cathodic protection. The corrosive action created within the hot water system means the magnesium anode breaks down over time – as opposed to your tank – and its condition upon inspection tells you when it’s time to replace it. That is if you actually check the set-up! Other manufacturers (Swift, Dometic, Truma, etc.) use either stainless steel or ceramic-lined tanks.
You should check your anode hot water system every six months or so under normal use and conditions, or prior to any trip where a hot water system breakdown would be hugely inconvenient, i.e. a remote adventure. Given the cost of an anode vs a hot water system is about $30 vs $900-ish, then it’s in your interest to make this a habit. It’s clear that many caravanners don’t!
How do you know it’s time to replace the anode?
You’ll notice a badly performing system or rubbish water quality. Or both. Typically, an anode should be replaced when it reaches 50% of its original diameter. Beyond that, and certainly, beyond a 75% reduction, you are doing harm to your hot water tank. This is an investment strategy. If your magnesium anode isn’t providing you with 12 month’s use then you can opt for an aluminium anode but as they react more slowly, only go down this route if the magnesium version doesn’t work for you. If not, you could be doing more damage to your tank prematurely.
How do you replace the anode?
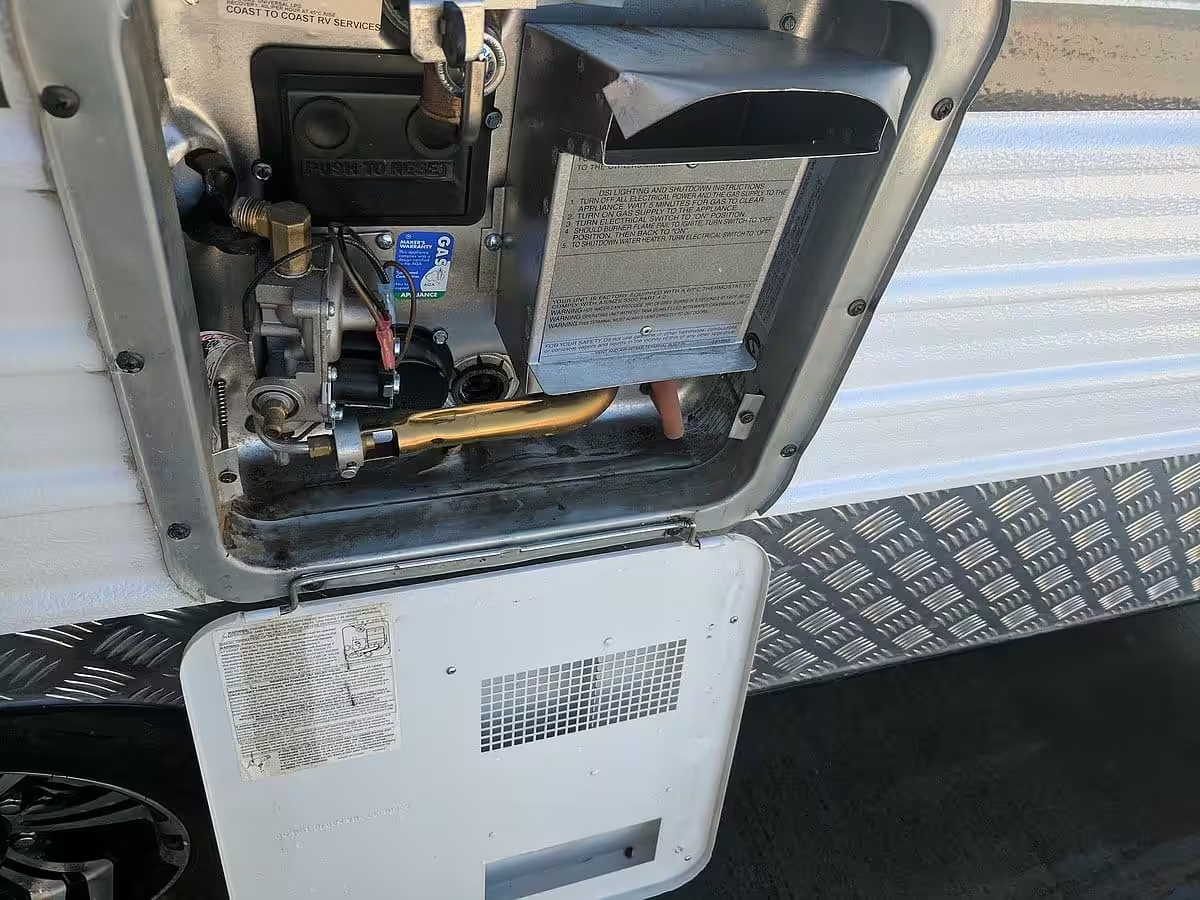
1. The water heater will have an access panel that you need to open to locate the anode.
2. Please maintain your personal safety by making sure everything has cooled down prior to checking your system. And be mindful you will need a bucket if working where water spills matter.
3. Turn off the water pump power.
4. Make sure the gas and electrical supplies to the water heater are turned off.
5. Disconnect your mains water supply to the caravan.
6. Release pressure in your tank by turning on the hot water tap in the van, and also operate the pressure release valve on your hot water tank.
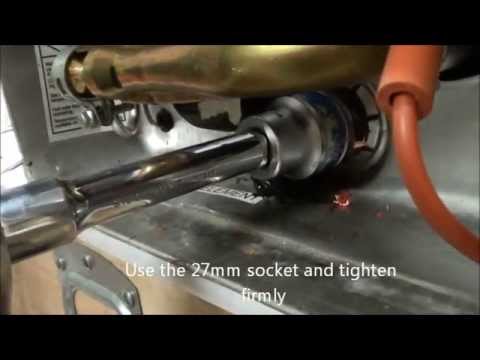
7. Be pre-warned that you will require a tube spanner or a socket in 27mm, or 1 1/16in AF sizes, but the socket is the better bet for ease of use.
8. Removal is by turning anti-clockwise.
9. Depending on how long it’s been since the anode was removed may determine how easy removal will be.
10. As you remove the anode, water will be released too, so stand back and/or grab your bucket.
11. Determine whether your anode requires replacement but before you insert the new one or reinsert the old one:
12. You should now flush the tank to remove contaminants. You can use a hose to do this and even an item such as the dedicated hot water tank rinser from Camco, if you feel it’s necessary. It won’t be pretty!
13. To further this process, now turn off the hot tap in the van and turn the water pump on to flush the tank until the water runs clear.
14. Now replace the anode.
Putting it back together
1. If your new anode didn’t come pre-wound with plumber’s tape then now use such tape to wrap the anode’s threads. This step applies to new and old anodes.
2. Reinstall the anode, clockwise.
3. Refill the water tank and observe any leaks, so you may need to tighten the anode further.
4. Turn the electrical and gas supplies to the hot water system back on.
A couple of extra tips
If you do any lay-off preparation for your caravan or camper, say, during winter, then you can decommission the hot water system using the above method and leave the tank empty. Just make sure filling it again is top of your list before turning anything back on.
If you’re just inspecting the anode it’s a good idea to give the whole system a flush and rinse as directed to help alleviate any build-up that these systems can accumulate. As we said earlier, you might be surprised.
While the anode scenario in the main applies to Suburban hot water systems, some Swift units also have anodes. Although replaceable, it’s generally not regularly, as the frequency is much longer because the Swift is set to protect against bacterial corrosion from the water used in the top half of Australia, not generalised corrosion as outlined in the rest of this story.
If you add this small maintenance job into your routine, then the hot water system should last you years on a new van. If you buy a used van, then this is one of the first jobs to check to ascertain the health of your hot water system before you suffer a breakdown or contamination somewhere inconveniently.
FOOTNOTE
There was a safety/recall notice issued in 2019 for the Suburban hot water systems which we covered here. The model numbers are listed in the recall notice. We’re offering this anode tips story under the assumption that owners take care of their personal safety considerations.