Caravan chassis: The things we thought we knew but didn’t!
How well do you know your caravan chassis? We look at chassis production and discover things we thought we knew, but didn’t! Talk to anybody in the caravan industry and they’ll say the backbone of a caravan is the chassis.…
How well do you know your caravan chassis? We look at chassis production and discover things we thought we knew, but didn’t!
Talk to anybody in the caravan industry and they’ll say the backbone of a caravan is the chassis. Yet there still seems to be a lot of misunderstandings or maybe it’s a lack of understanding about chassis in general, in relation to how they are constructed and whether they will last the distance.
I’ve now chatted with steel people, chassis manufacturers and galvanisers and I discovered there’s a lot more to building a chassis than I was aware of. The first thing I discovered was that the steel used to manufacture a chassis here could be Australian or it could come from overseas and quality varies accordingly. Most people I chatted with use Australian steel.
Various grades of steel are used but Dual Grade RHS (Rectangular Hollow Section) steel or SHS (Square Hollow Section) steel with a grade of C350 to C450 are the most common on Aussie-built vans. They vary in size from 150mm x 50mm and 100mm x 50mm in RHS and 50mm x 25mm and 50mm x 50mm in SHS depending on how the chassis is being built; the thickness of the metal used varies from around 2mm to 5mm.
Some chassis systems are manufactured from C-section steel (Jurgens Caravans is one example) and are designed to bolt together rather than be fully welded. Chassis are designed for strength and durability and although the consensus is that strength requires weight, that’s not always the case. It’s about a chassis being built for purpose.
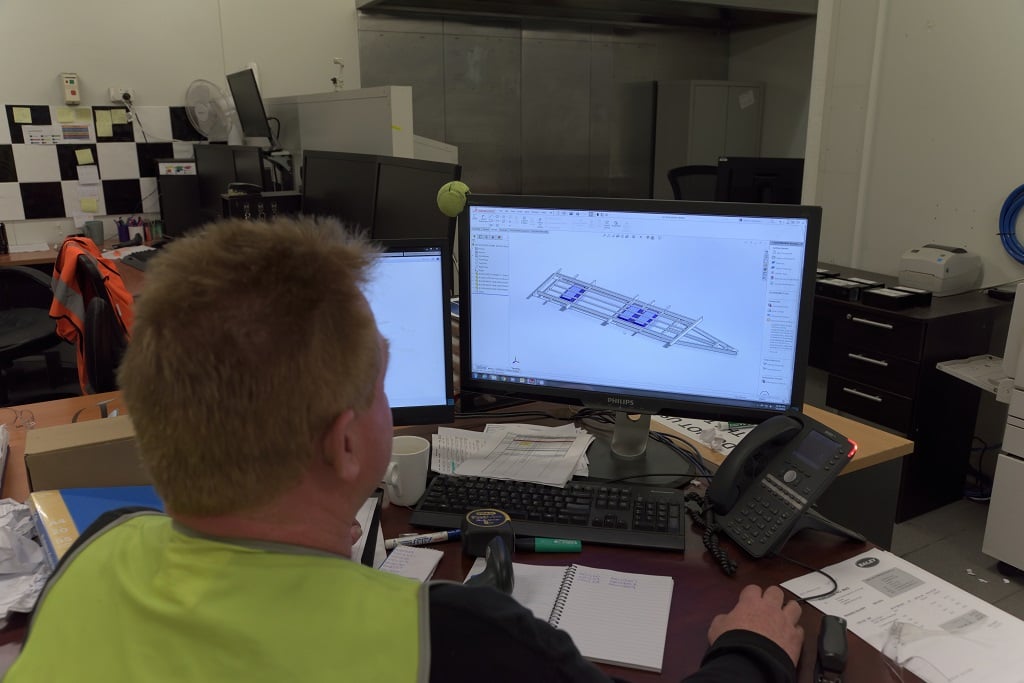
Chassis take shape by using CAD (Computer Aided Design) and CAM (Computer Aided Manufacturing) programs, which are great for designing the chassis to specifications and then creating a parts list for the assembly. Some manufacturers go as far as using finite element analysis as a part of the design process, which can show where all the stress points are and where things can be modified to manufacture strength into a chassis without needing as much steel. These programs are now a huge part of the industry and will only become more so over time in order to manufacture durable, lighter chassis for our harsh road conditions.
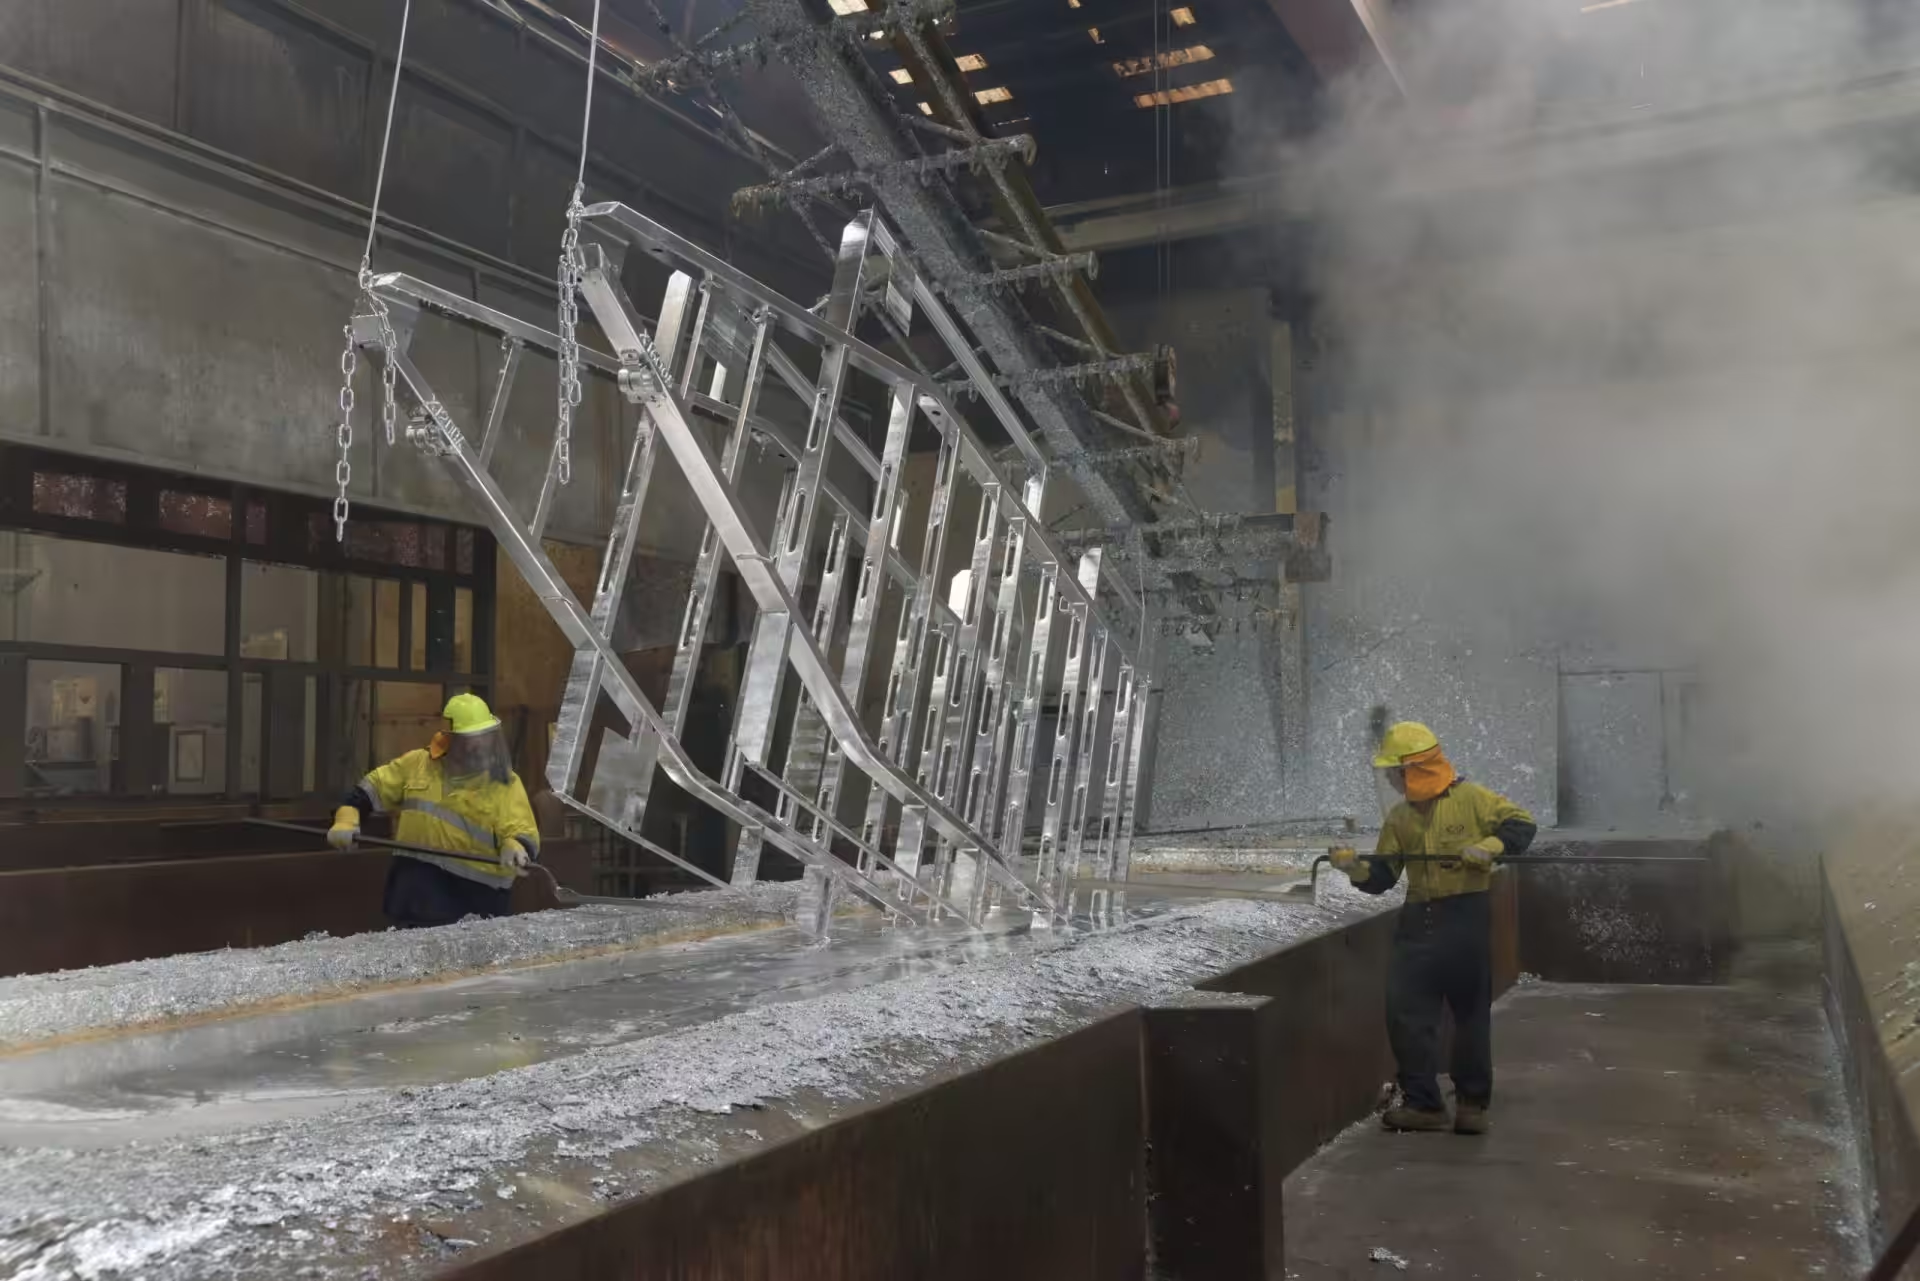
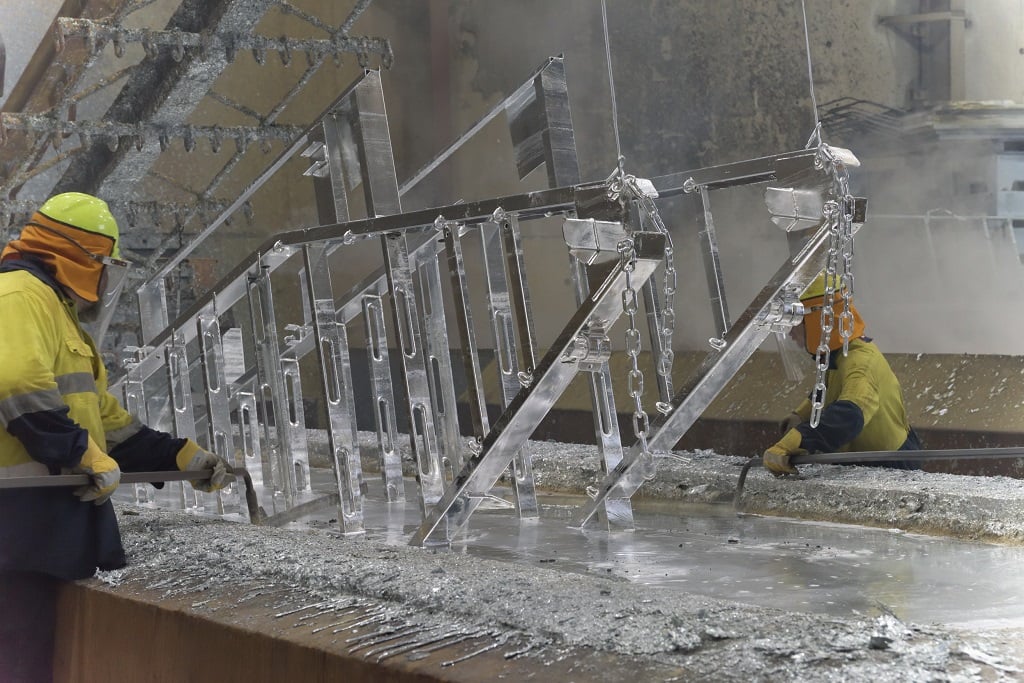
Chassis finishes vary from hot-dipped gal to painted surfaces. We’ve heard the terms Duragal and Supagal, essentially these are coatings on the steel (inside and out) to protect it to approximately seven microns’ worth. Galvanised steel coats are between 56 and 80 microns thick. Gal gives off a bad (toxic) smell when welded so often the chassis is manufactured from uncoated steel and once completed it’s dipped in gal to create a shiny, durable finish where the dip actually becomes a part of the steel. This also means that if scratched, rust doesn’t grow under the coating unlike with paint.
Galvanising is a dramatic technical process where steel is submerged in various chemicals to clean it before it’s dipped in molten zinc, at around 450°C, to fill every nook and cranny. This coating then becomes a part of the steel it’s protecting. Typically, galvanising adds around five percent to the overall weight of the chassis.
The intense heat can warp the steel though, and that needs to be taken into account by the caravan chassis manufacturers. This warping can be negated with proper chassis design for galvanising. Another factor that can affect the gal process is cheap steel. This shows up as blemishes in the finish. According to GB Galvanizing, in Victoria, there’s nothing much that can be done. They can’t control the steel quality and the suggestion is to ensure you know the origin of your steel and understand the possible consequences.
Raisers are often incorporated into a chassis. A raiser is a second section of RHS welded onto the chassis. Adding a raiser offers extra body height, allowing for greater wheel articulation and creating a flat floor for the van. It also adds strength to the chassis. Two RHS sections welded together are stronger than the equivalent size RHS due to reduced flexibility within the width of the steel.
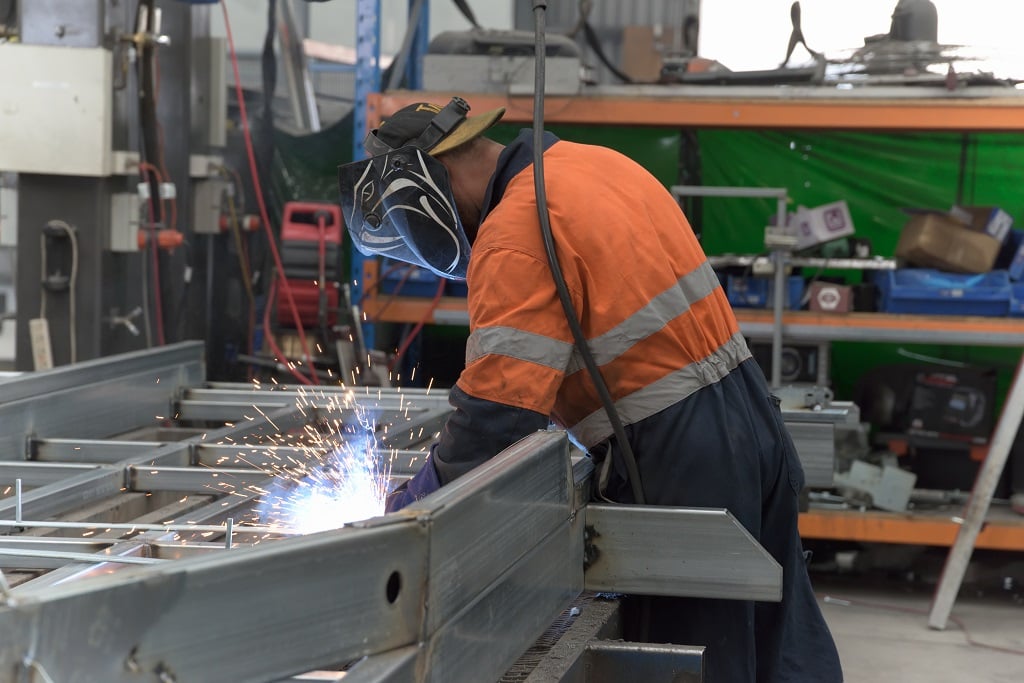
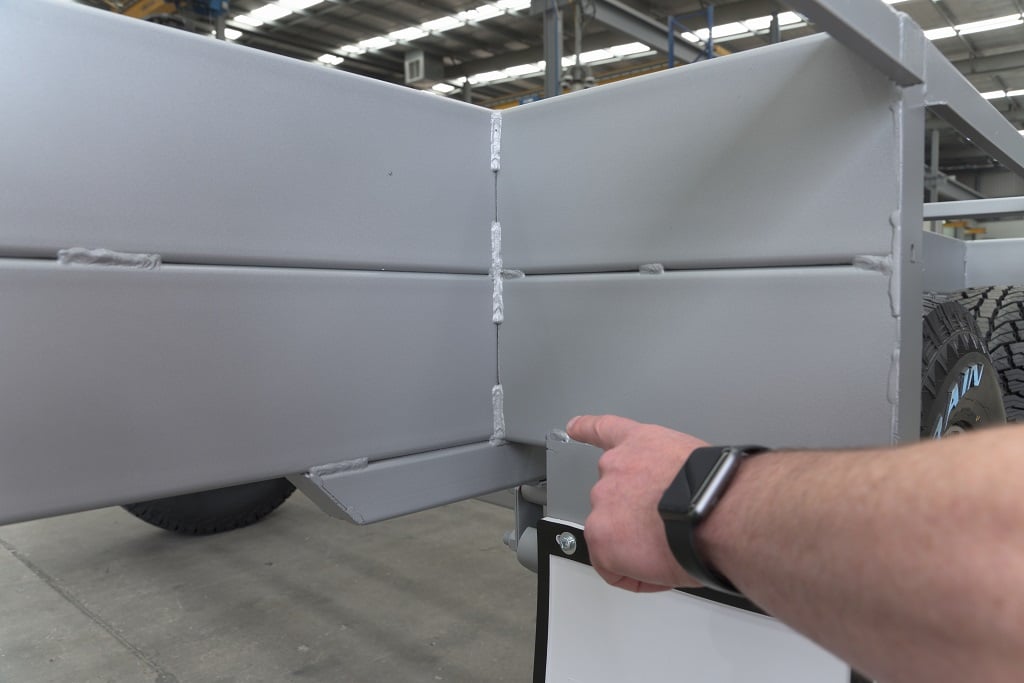
Welding is another interesting part of the chassis building process. Welding on a chassis is typically stitch welding, meaning short runs every 350 to 400mm. Stitch welding allows for some flexibility and movement in the chassis. If the welds were full along every section of steel the chassis would be too rigid and crack under travel conditions.
Welding across the steel rather than on the corners can also create problems by reducing the steel’s ability to stay rigid. Most steel cross-sections are only welded on the sides for the same rigidity reasons. There is certainly an art to welding a chassis so it stays together and doesn’t crack under use.
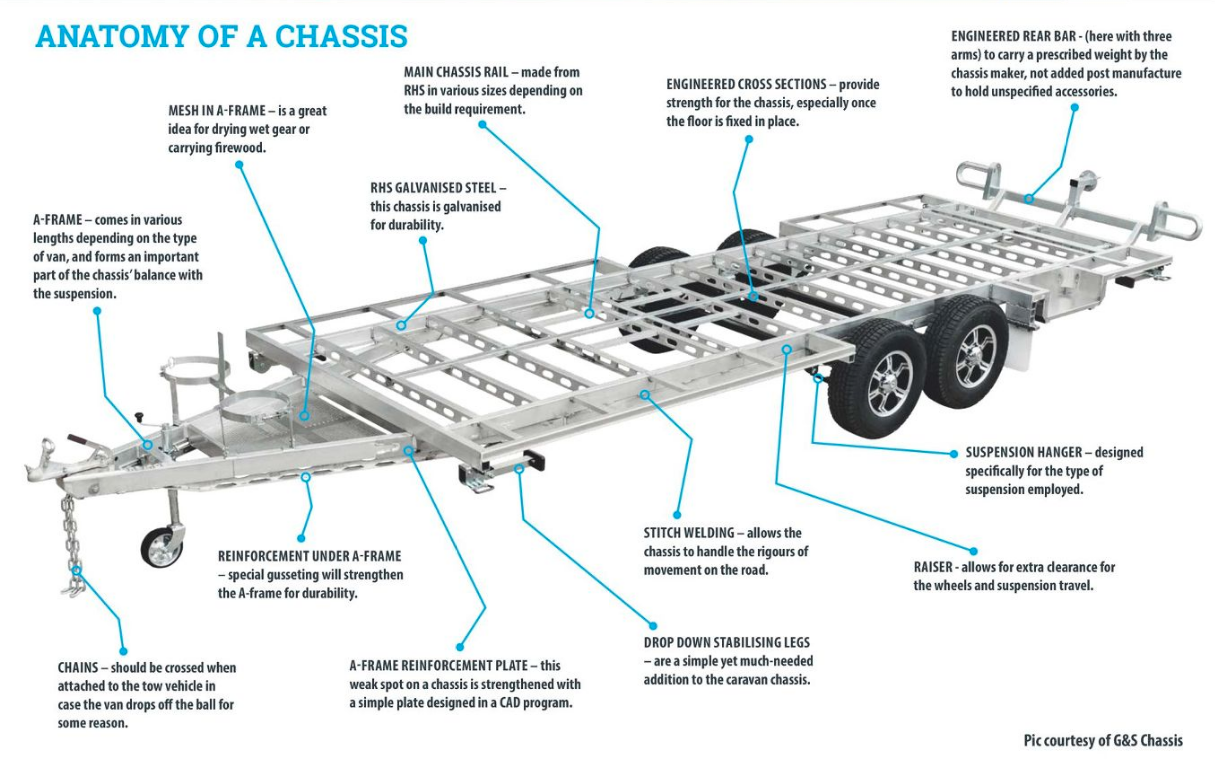
Let’s look at what makes up a chassis
Items to note
Chassis manufacturers are often blamed for problems with balance or with a chassis cracking on a van, but chassis manufacturers only build to specifications. It’s the caravan manufacturer’s responsibility to build the van to the chassis in regard to weight and balance. All chassis manufactured must comply with ADR rules, which govern the A-frame and the suspension system. This includes the coupling, chains, springs and suspension components, brakes and even rims and tyres.
The caravan manufacturer is responsible for setting up the right weight balance on the van and to ensure the van matches the existing tow vehicle or a new one that’s pending. If the nose is up in the air or dipping down too low the van will be unbalanced and likely be a nightmare to tow.
The chassis is designed to be the backbone of a caravan. Adding things onto it such as rear storage boxes, bike racks, even toolboxes on the A-frame can create weight stresses that were not built into the chassis and may cause it to fail. Many manufacturers keep accurate records on how the van is built so they will know if potentially ‘illegal’ mods have been carried out. This will, of course, dissolve any warranty that applies to the van.
Conclusion
There is a science to building a solid, reliable, fit-for-purpose chassis. Vans coming in from overseas often have light chassis and not all chassis are designed for serious outback travel. By learning about the chassis before pen goes to paper on a deal means there’s every chance buyers will get the right chassis for their intended purpose. Education is the key.
Maintenance tips from G&S Chassis
Maintaining your van is critical for longevity and this includes the chassis. Check out these tips from Joe Inturrisi, of G&S Chassis: After every trip, clean and check the chassis for any cracks, potential problems and stone damage; paint any rusty areas as required. On independent suspension systems: check the wheel alignment as some have a toe-in and possibly camber adjustments. Grease all bushes and maintain correct tyre pressures for the conditions. Always check the wheel nuts to ensure they are tight, ensure the chains are crossed, the handbrake is off before travel and always use a locking clip to secure the coupling lock when connected to the vehicle.