This DIY approach will protect your van from stone strike, and make you feel warm and fuzzy.
Words & images Mark Allen
Brand-new, shiny caravan – tick.
Grand plans of hitting the dirt roads – you betcha!
Worried to death about denting, scratching or damaging the van from stone strike while hurtling down those unavoidable rock-strewn tracks… my oath I am!
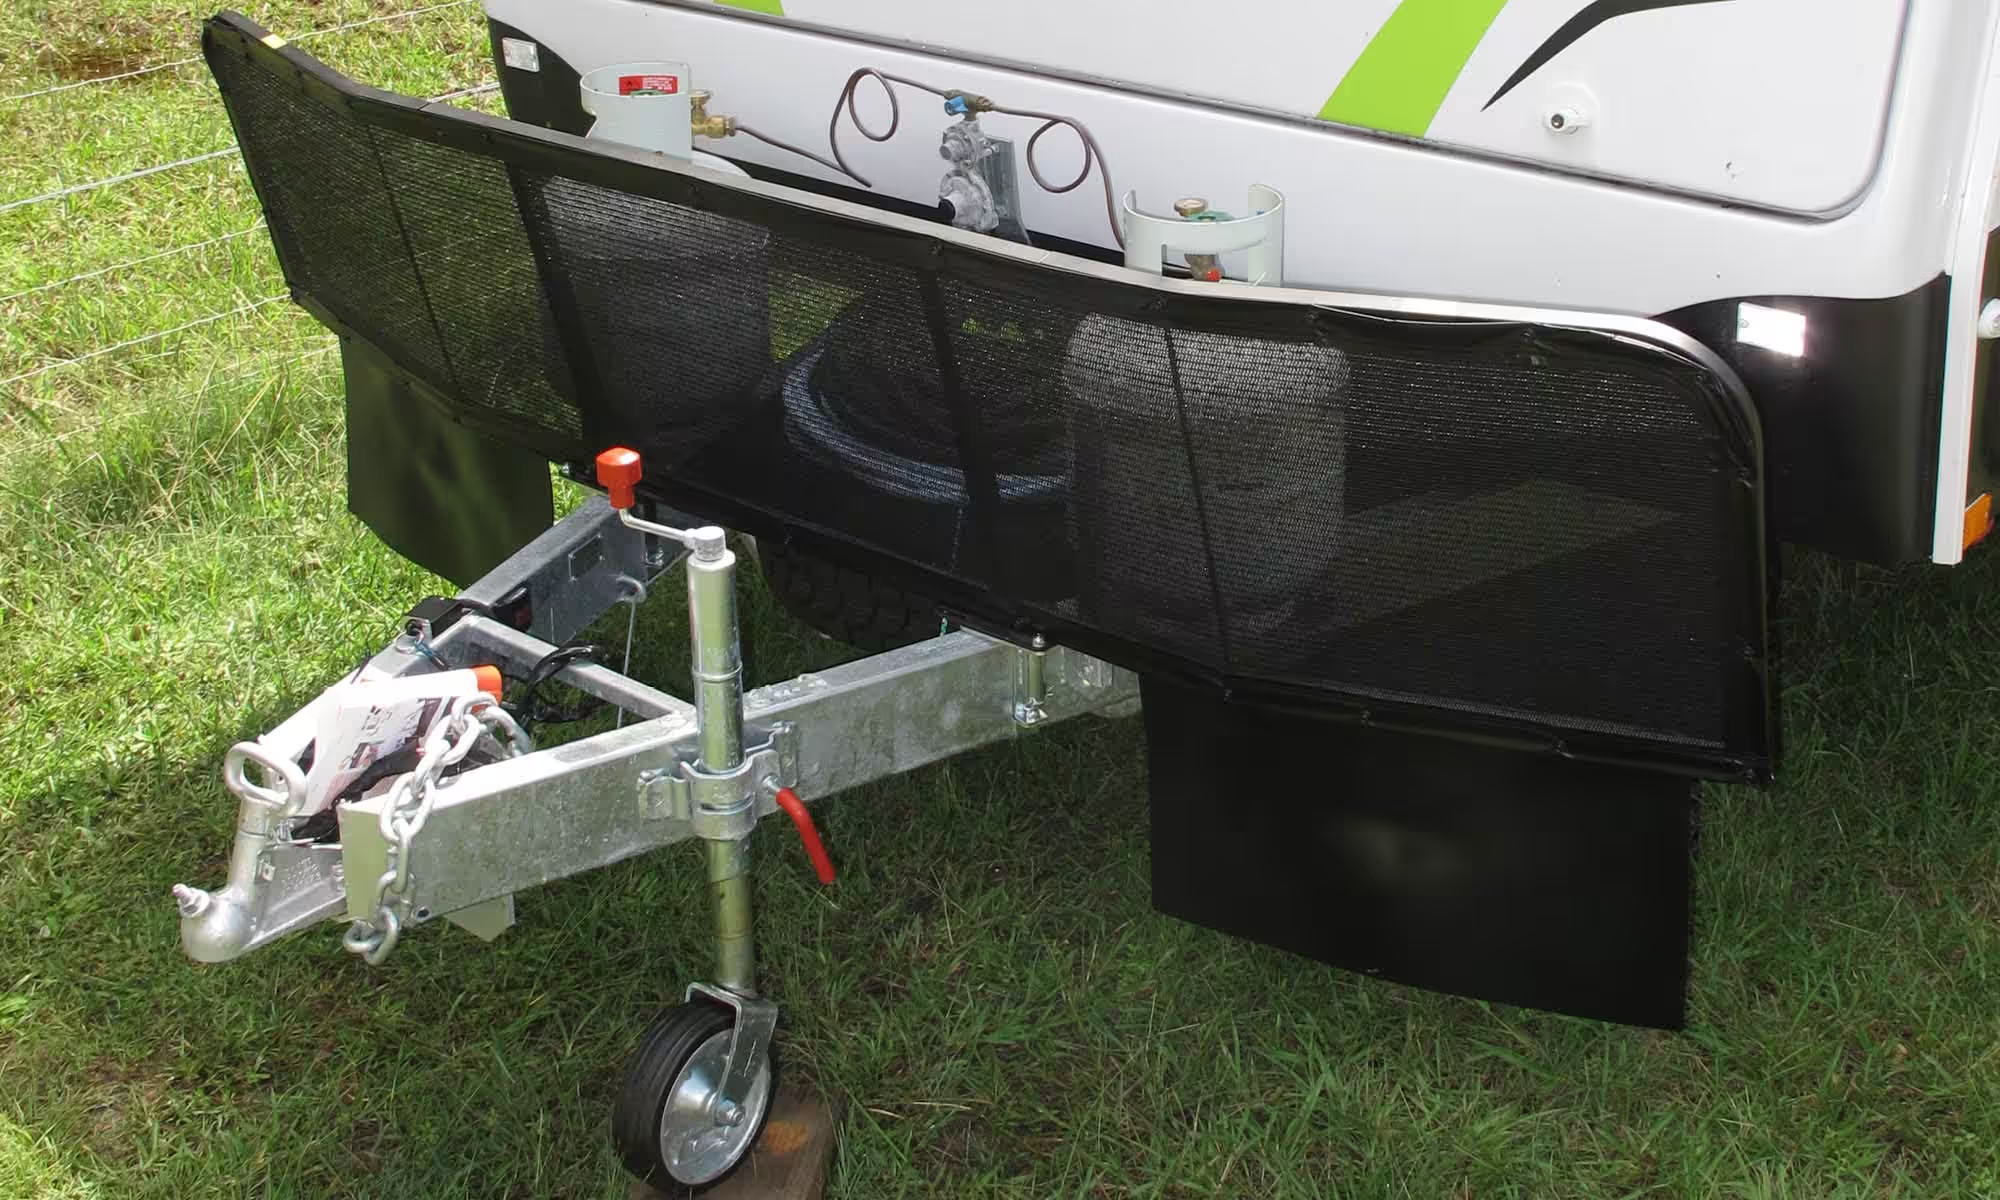
There are a couple of different types of stone guards, stone shields or stone deflectors on the market, all of which have their pros and cons. I figured, for my use, a front-facing shield-type deflector would do the best job at protecting my expensive home on wheels investment, so I went about searching for the best deal combined with my must-have features: Tapered side wings so as not to allow the tow vehicle to hit the guard during tight turns; forward-leaning so as not to bounce stones back into the rear of the tow vehicle; easily adjustable fitting so I didn’t have to swear too much while installing it; easily removable mesh to allow replacement; easy to remove the whole unit if needed; mud flaps hanging from the outer lower edges to help prevent rocks striking under the van.
One other feature I needed to take into consideration was the overall height that the guard sits when fitted, so as not to foul on the front flip-down bed of the Jayco Expanda.
While not detracting from the bricks and mortar stores, I also searched far and wide through all the Australian-based online offerings. I settled on a Coast to Coast Caravan & Leisure unit at www.coastrv.com.au which I found to be exactly what I wanted, and my closest stockist was a mere 20-minute drive into town at Watsons Caravans in Port Macquarie.
I took particular note of the two options they offered – one is ideal for camper-trailers while the other (which I purchased) is wider and more suited to caravans. For those who need to know, the Product Code is 450-06500 and the item is called a Caravan Stone Shield with Mesh. It measures 2310mm wide x 500mm high.
With much relief, once I’d opened my cardboard packaging and checked through the parts, it seemed to be a pretty easy and straightforward job to put the kit together. I hate reading too many instructions and spending a long time fumbling with hundreds of parts.
Once the square-section frame had been assembled, I screwed the rip-stop mesh to the pre-drilled frame and mounted the rubber mud flaps to the frame. Then it was time to position the whole guard onto the van’s A-frame. Luckily (or more likely by design), even this part of the job was simple; achieved by mounting the U-shaped brackets to the drawbar.
If for some reason I ever have to pop the stone deflector off the van, it’s as simple as pulling two pins from the mounting points and the whole thing lifts away. It’s not heavy, so this can easily be done by one person.
Fast forward almost two years. The stone guard has done its job as expected. As far as protecting the van, I reckon I’ve preserved plenty of re-sale value with no stone strike damage. I’ve never had the need to remove the unit, so perhaps that feature isn’t worth much… except for that one time it may be needed (tomorrow… ya just never know).
One thing that has changed is my tow vehicle. My previous 100 Series LandCruiser with twin rear-mounted spares didn’t touch the stone shield, even on full lock. Imagine my surprise when the new Troopie’s rear-mounted dual jerry can holder scraped the shield’s frame and did minor damage to the rip-stop mesh – bugger!
While there is a bit of a ‘flimsy’ feel to the whole product as it moves around slightly on its detachable mounts, that’s to be expected compared to a solidly-mounted version. Overall I reckon it’s a beaut product and I’ve also managed to mount a spare wheel bag to the front for stowing my hoses in. I have thought of trying to bend the outer frame a little more so as not to hit my tow vehicle; but now that I know it hits, perhaps I’ll not try to tackle such tight turns.
RRP$299; paid $250 in-store.