Here’s your guide to installing satellite
WORDS & images PHIL LORD
If you can’t do without TV when in the bush, then the only way around it is to fit a satellite unit to your RV. Here we’ll walk you through what’s involved with the install.
Because this job does not involve gas or AC electrical work, anyone can do the install. While it’s straight-forward, this is a fiddly job and requires that you have some confidence in your home-handyman skills. If you are not sure about doing things like drilling holes through your RV’s roof or connecting up 12V electrical components, it’s probably best that you step away now. Even so, with this guide, you will at least have a fair idea of what’s involved when you get an RV workshop to do the job.
This installation guide is for a Sphere SSA-850 RV satellite, although other brands will require a similar fitment procedure.
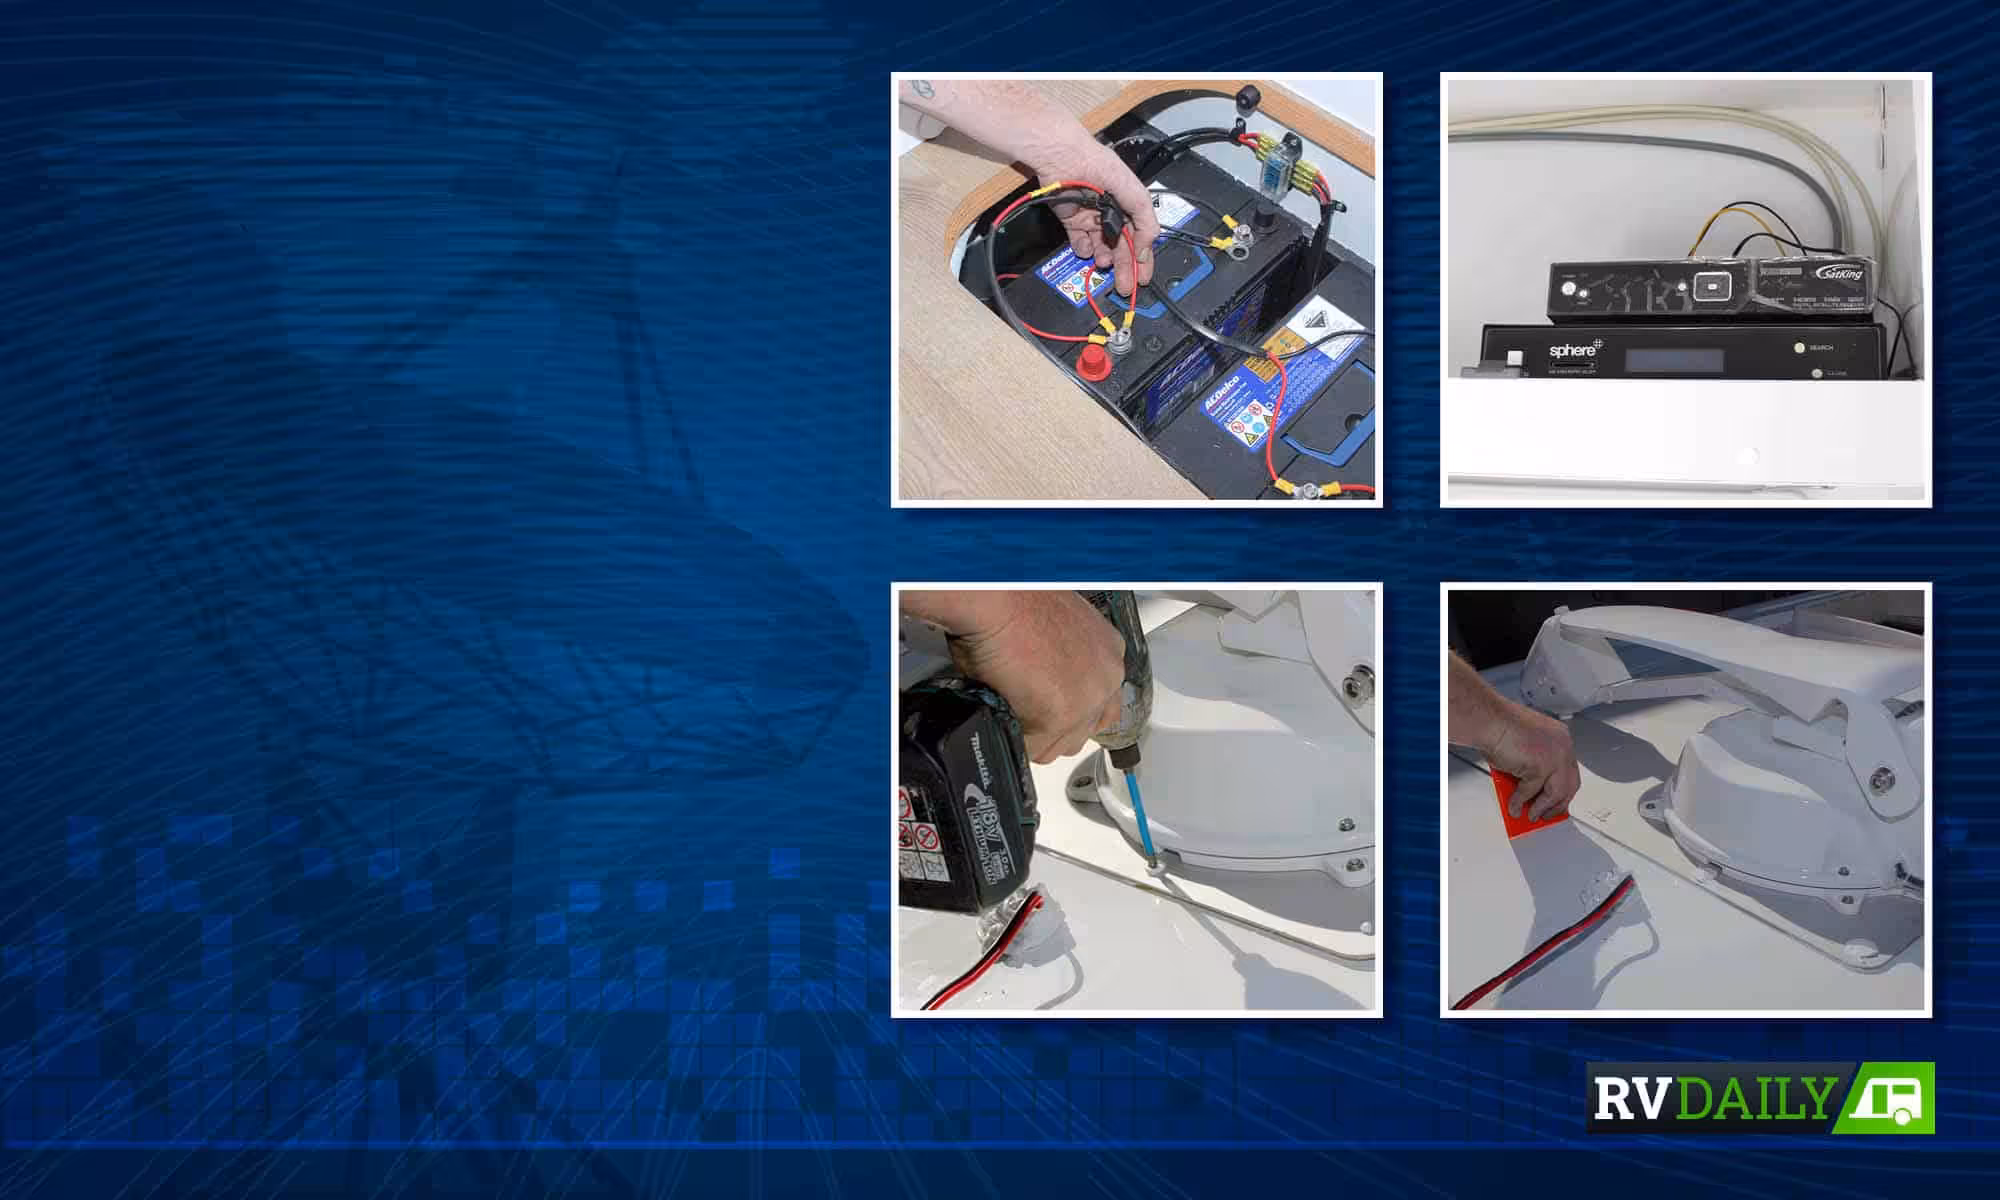
There are three components you’ll need for a satellite installation: the RV satellite kit, which will include the aerial (satellite dish and its base); wiring; and the indoor unit (IDU), which powers the satellite and receives signals from it. In addition, you’ll have to get a VAST satellite decoder to receive TV signals, and obviously have a TV unit installed in the RV. The decoder needs a card to work, and for that you have to apply through the Australian Communications and Media Authority to prove that you are a genuine traveller.
Before you begin the installation, you’ll need to find the right spot to fit the antenna and plan where to route its wiring. The antenna unit has to be fitted in a north-south orientation, on a corner of the roof. When the unit powers up, it must not be able to come in contact with surrounding components on the RV, such as an air-conditioning unit or hatches. You also need to work out where you will route wiring from the antenna to the control units and the house battery. In this case, the wiring needed to go from the offside rear (where the antenna was fitted) to the nearside of the roof, where it could be fed through the roof into the internal locker area. The TV and power wiring then needed to be fed across to the offside to the TV unit and house battery respectively.
Measure where the wiring will need to be routed and fed through, making sure that you will have enough of the supplied wires for the way you plan to route the wiring (the kit should come with ample wiring, but it pays to check).
Clean both the roof area and the antenna base with wax and grease remover so that the sealant will adhere properly. Apply either a neutral-cure silicone or polyurethane sealant to the antenna base and fit the base to the roof. Then use screws to fix the base to the roof. Apply sealant around the screws to ensure that they don’t allow moisture to enter the RV.
The antenna connector housing base can now be attached to the roof, using the same securing method as the antenna base. Plug in the connectors from the antenna to the wiring supplied with the unit that you’ll later route through to the IDU.
Now clip in the connections to the connector cover base and then attach the cover with the supplied screws.
Drill a 35mm hole in the roof (using a hole saw) at the point you’ve chosen to route the wires into the RV. Guide the wires though the hole. Fit conduit around the wiring from the wiring connector box to the point at which the wires enter the RV. Trim the excess conduit and then secure the conduit to the roof with a fastener every 25-30cm or so. The fasteners each need sealant applied under the collar and then over the screw to ensure there are no leaks.
Next up is to seal the hole with sealant and secure the supplied cover plate with sealant and screws.
Now the interior wiring running along the top lockers can be tidied up with fasteners.
The coax cable needs to be fed through to the TV mount and power/earth wires fed through to the battery. How you do this depends on your RV’s layout: in this case, we had to feed the wiring back across from the nearside to offside underneath the RV. Ideally, here we would have fitted the IDU and satellite decoder on the offside of the layout but there was simply no room, so we had to cut holes in the nearside wall and floor to run the wires across. The wires were sheathed in conduit and secured where they ran underneath the van. Holes through the floor must be filled with sealant to avoid getting water into the van.
You’ll need to fit a 5A (max) inline fuse on the positive wire at the battery and to crimp and solder connections to ensure they stay connected long term. There’s also a ground wire that must be connected to the negative post of the battery, the chassis or a common ground point on the RV.
It’s time to see that the unit works. Turn on the satellite’s indoor unit (IDU) and satellite decoder. Make sure that both units power up normally. Then the units must be mounted clear of each other (at least 30mm apart) to avoid the risk of either unit overheating. Now you can register your decoder unit with the AMCA. Once that’s done (give it 48 hours for an online application) you can power up the satellite, turn on the TV and watch your favourite free-to-air shows wherever you roam.