RV air-conditioning not working? Here are 5 possible causes
RV air-conditioning not working? We show you five things you can check to get your RV air conditioning working again.
Published on: 22 October 2025
As we head into another scorching Australian summer, there’s nothing worse than finding your RV air-conditioning not working when you need it most. Most RVs have air-conditioning units mounted on the roof, where they’re out of sight and out of mind – until they break down. Fortunately, most issues come from lack of maintenance or incorrect operation. We’ll show you five things you can check to get your RV air-conditioning working again.
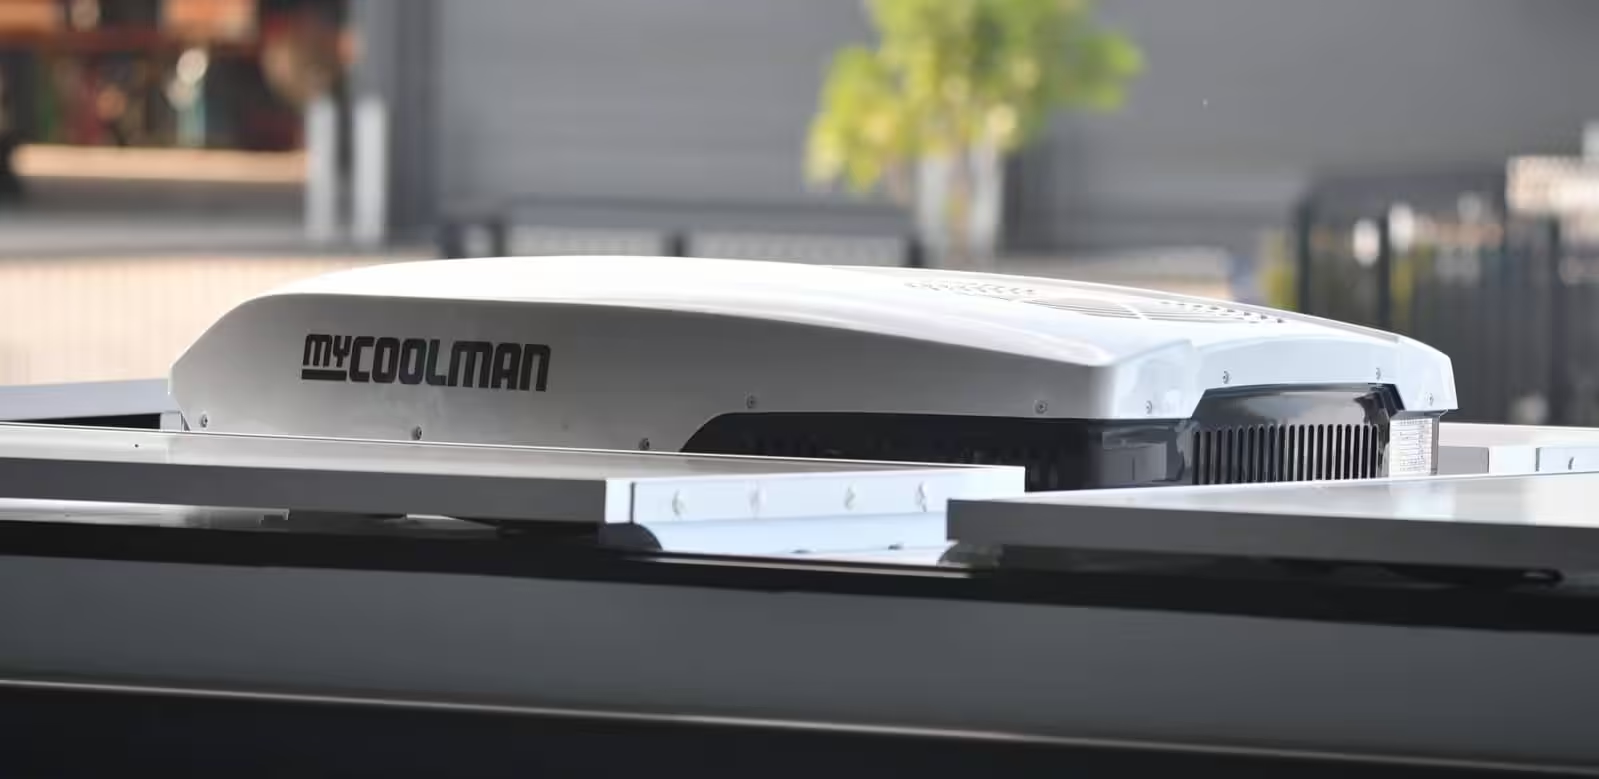
Our caravan came fitted with an Ibis AirCommand III rooftop air conditioner. For five years, it operated without any dramas at all. That was despite the fact we’d done almost no maintenance during that time (yeah, I know – rookie error). Then, during an extended stay in Townsville, Queensland, we started experiencing some problems. It wasn’t cooling down the van anywhere near like it used to. It also started leaking a steady stream of water through one of the lights in the ceiling. At the same time, an error code flashed on the LED display.
We switched it off, bewildered as to why our RV air-conditioning wasn’t working. For the next 20 minutes, we could hear what sounded like chunks of ice falling inside the unit. Time to do some investigation into what was causing the problems. After researching the issues on the internet and taking apart our air conditioner, we found these five common problems and what to do to fix them. These five causes apply to virtually all rooftop RV air conditioners – whether you’ve got a Dometic, Ibis, AirCommand, Truma, or Houghton unit.
One thing our research revealed is that, like most owners who experience issues with their rooftop units, we had the thermostat set at too low a temperature. These air conditioners are good, but they can’t perform miracles. If the outside temperature sits above 35 degrees and the relative humidity climbs above 50%, your unit will struggle to get the internal air down to the set temperature.
The compressor will run continuously, trying to keep up. This builds more condensation on the radiator fins, which can freeze into ice and further reduce the cooling effect. By setting the thermostat to a temperature between 23 and 25 degrees, your unit doesn’t need to work as hard. This means it can cycle effectively, maintaining the set temperature and reducing the risk that your RV air-conditioning will stop working when the going gets tough.
Hot tip: I know it’s tempting to crank it down to 18 degrees when you first walk into a hot van, but resist the urge. Set it at 24 degrees and let it work steadily. You’ll get a more comfortable, consistent temperature and your unit will last longer. I’ve learned this lesson the hard way – patience pays off.
The next thing to check when your RV air-conditioning is not working is your internal air filter. Make sure dust hasn’t clogged it up. We already knew these filters needed regular cleaning. But what we found out was, because we were running the air conditioner all day, it required more frequent cleaning. Sometimes as often as once every couple of days. Cleaning the filter isn’t difficult, but you need to do a thorough job.
We used a blower tool to remove the bulk of the dust and then cleaned the rest off using a bucket of soapy water and a small brush capable of getting into the grooves of the filter. You need to be very careful cleaning these filters. Some are more fragile than others and can tear if you’re too rough with them.

Hot tip: Set a reminder on your phone to check and clean your filters every week during heavy use periods. It takes five minutes and could save you from a complete failure in the middle of nowhere. I now check ours every Sunday morning with my coffee – it’s become part of the routine.
Once the internal filter is clean, your next task to get your RV air-conditioning hopefully working again is to check the roof-mounted unit itself. This is not a job for anyone afraid of heights or not confident on a ladder. It involves removing the plastic screws around the lower portion of the unit and lifting off the cover to expose the inner workings. When I looked at ours, I was shocked at how filthy it was under that cover.
Ensure you disconnect your caravan from the 240V mains before cleaning the rooftop unit! This is non-negotiable.
After blowing out all the loose leaf matter and other debris, you need to check the drain holes at the base of the unit. Now, all air conditioners will be slightly different, but they should all have a drainage system of some sort. It’s likely to be very basic.
In the case of the AirCommand III, there are a series of holes around the outside of the base. These are all isolated from each other by plastic mouldings. Over time, these holes get blocked with dust and eventually prevent the condensation from draining away. In my opinion, it’s a stupid design. All it takes is for one or two of these drains to block up, and you have the potential for condensation to run onto the heat exchanger radiator fins, icing up or leaking back into the roof space.
Nearly two-thirds of ours were blocked up with hard-caked fine dust. Fortunately, unblocking them is a simple task. Using a small screwdriver, I loosened the dust and blew out all the dirt using a blower tool. No wonder our RV air-conditioning wasn’t working very well!
Hot tip: While you’ve got the cover off, take photos of everything with your phone before you start cleaning. Trust me on this one. When it comes time to put it all back together, you’ll be grateful for those reference photos. I learned that lesson after spending 30 minutes trying to remember which way a particular component fitted.
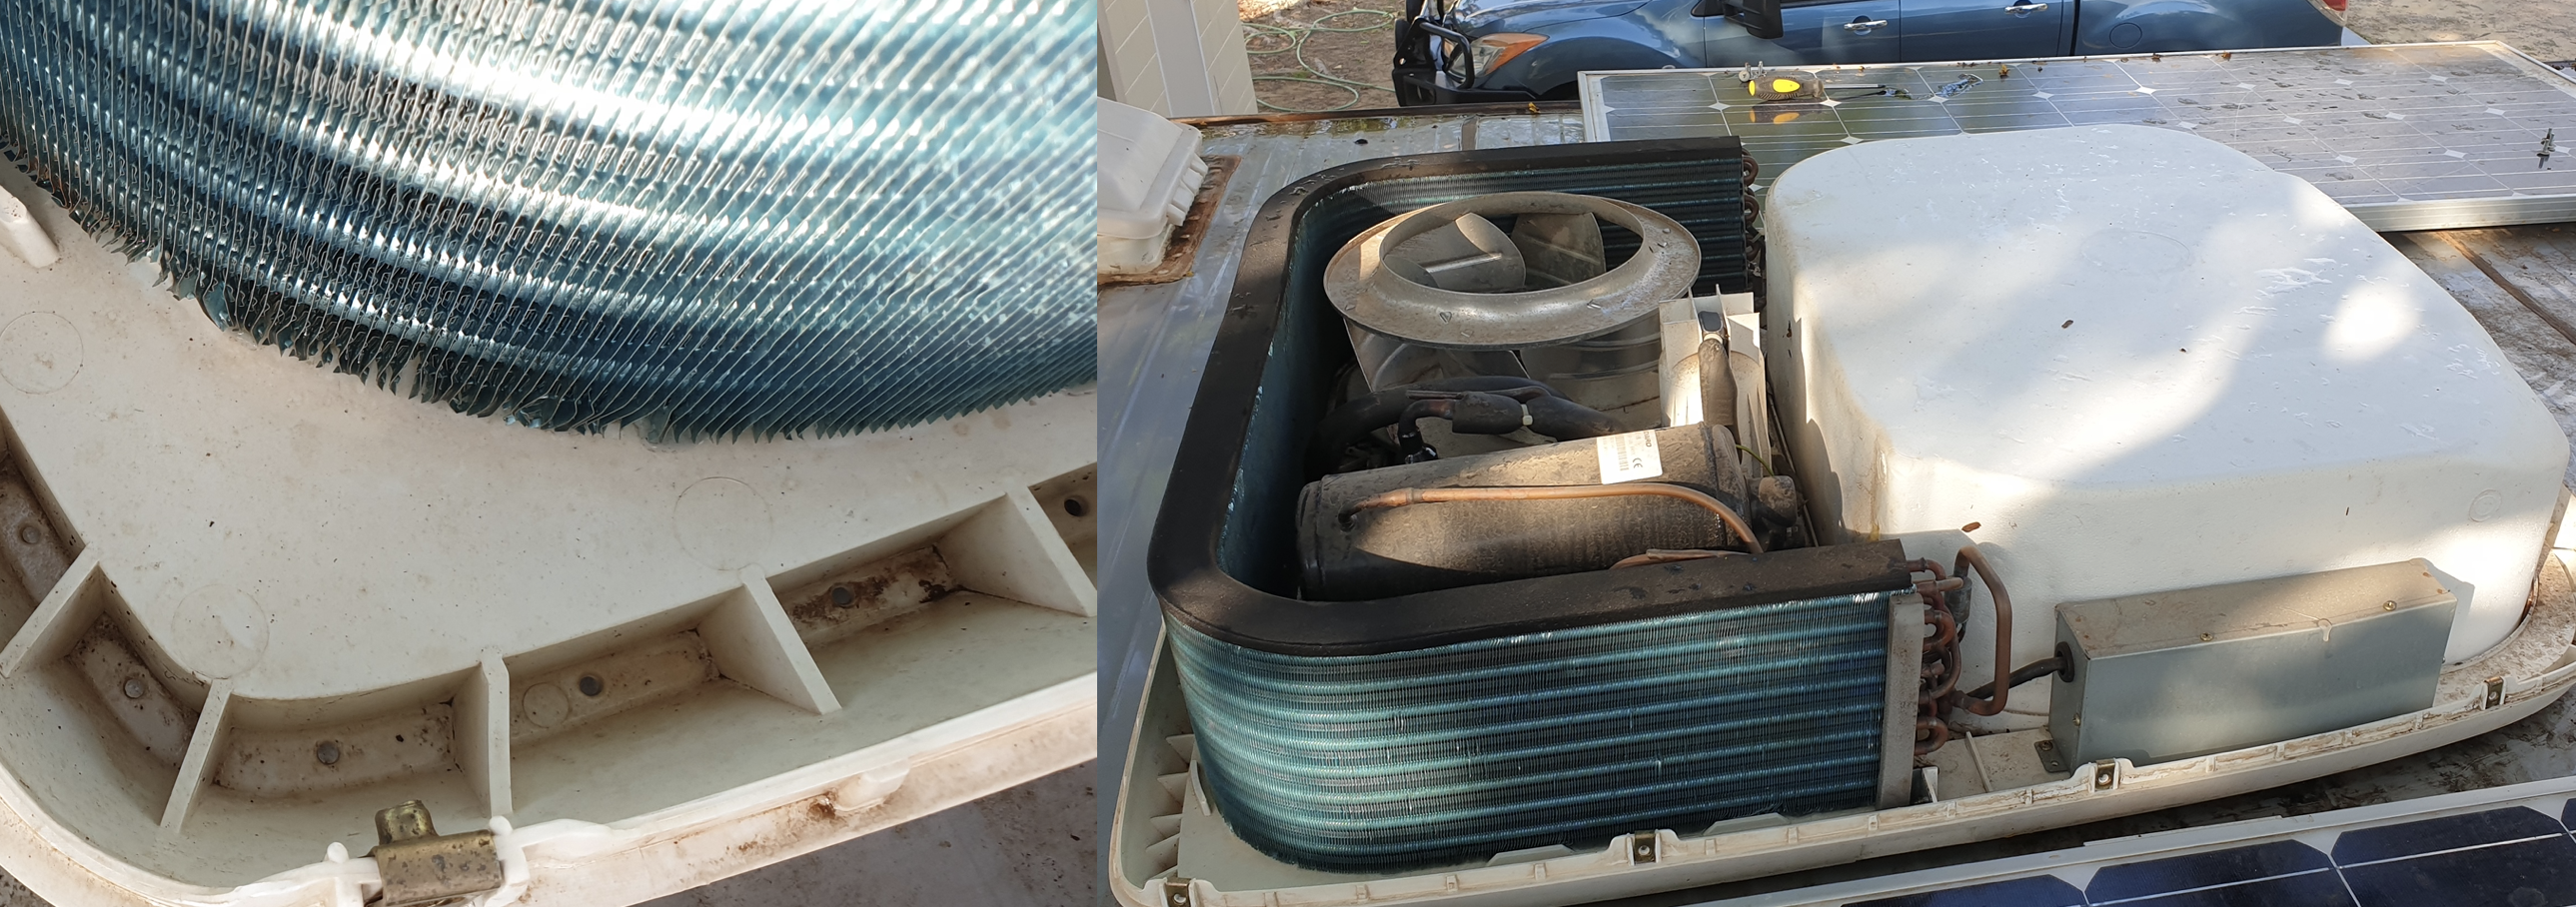
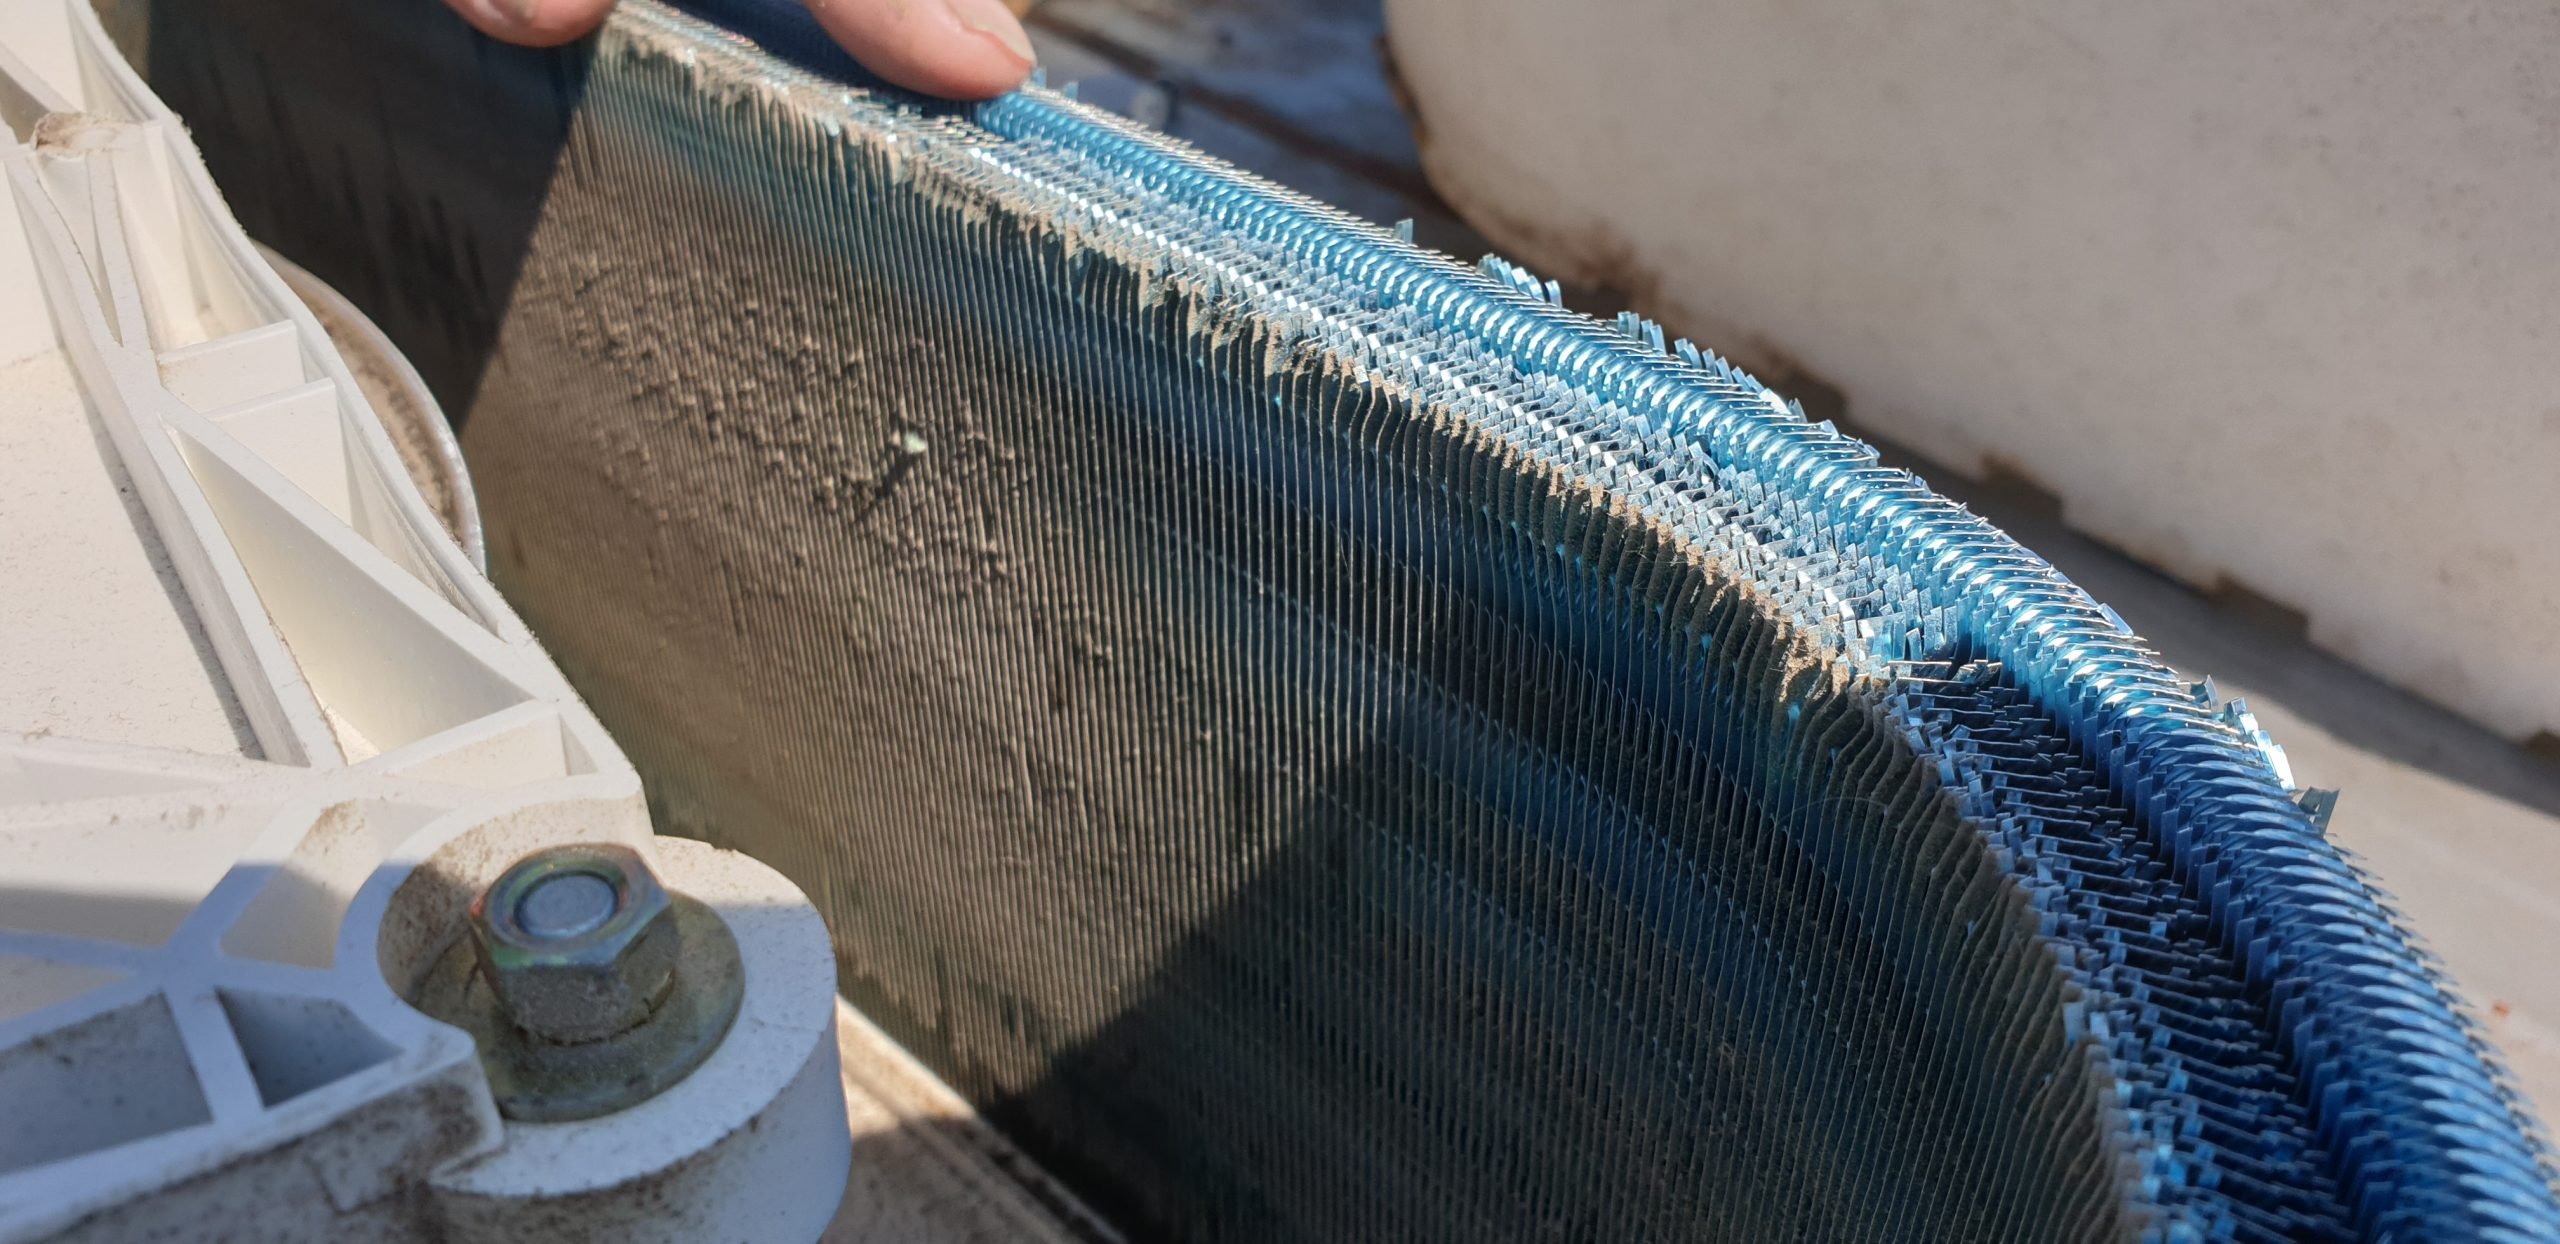
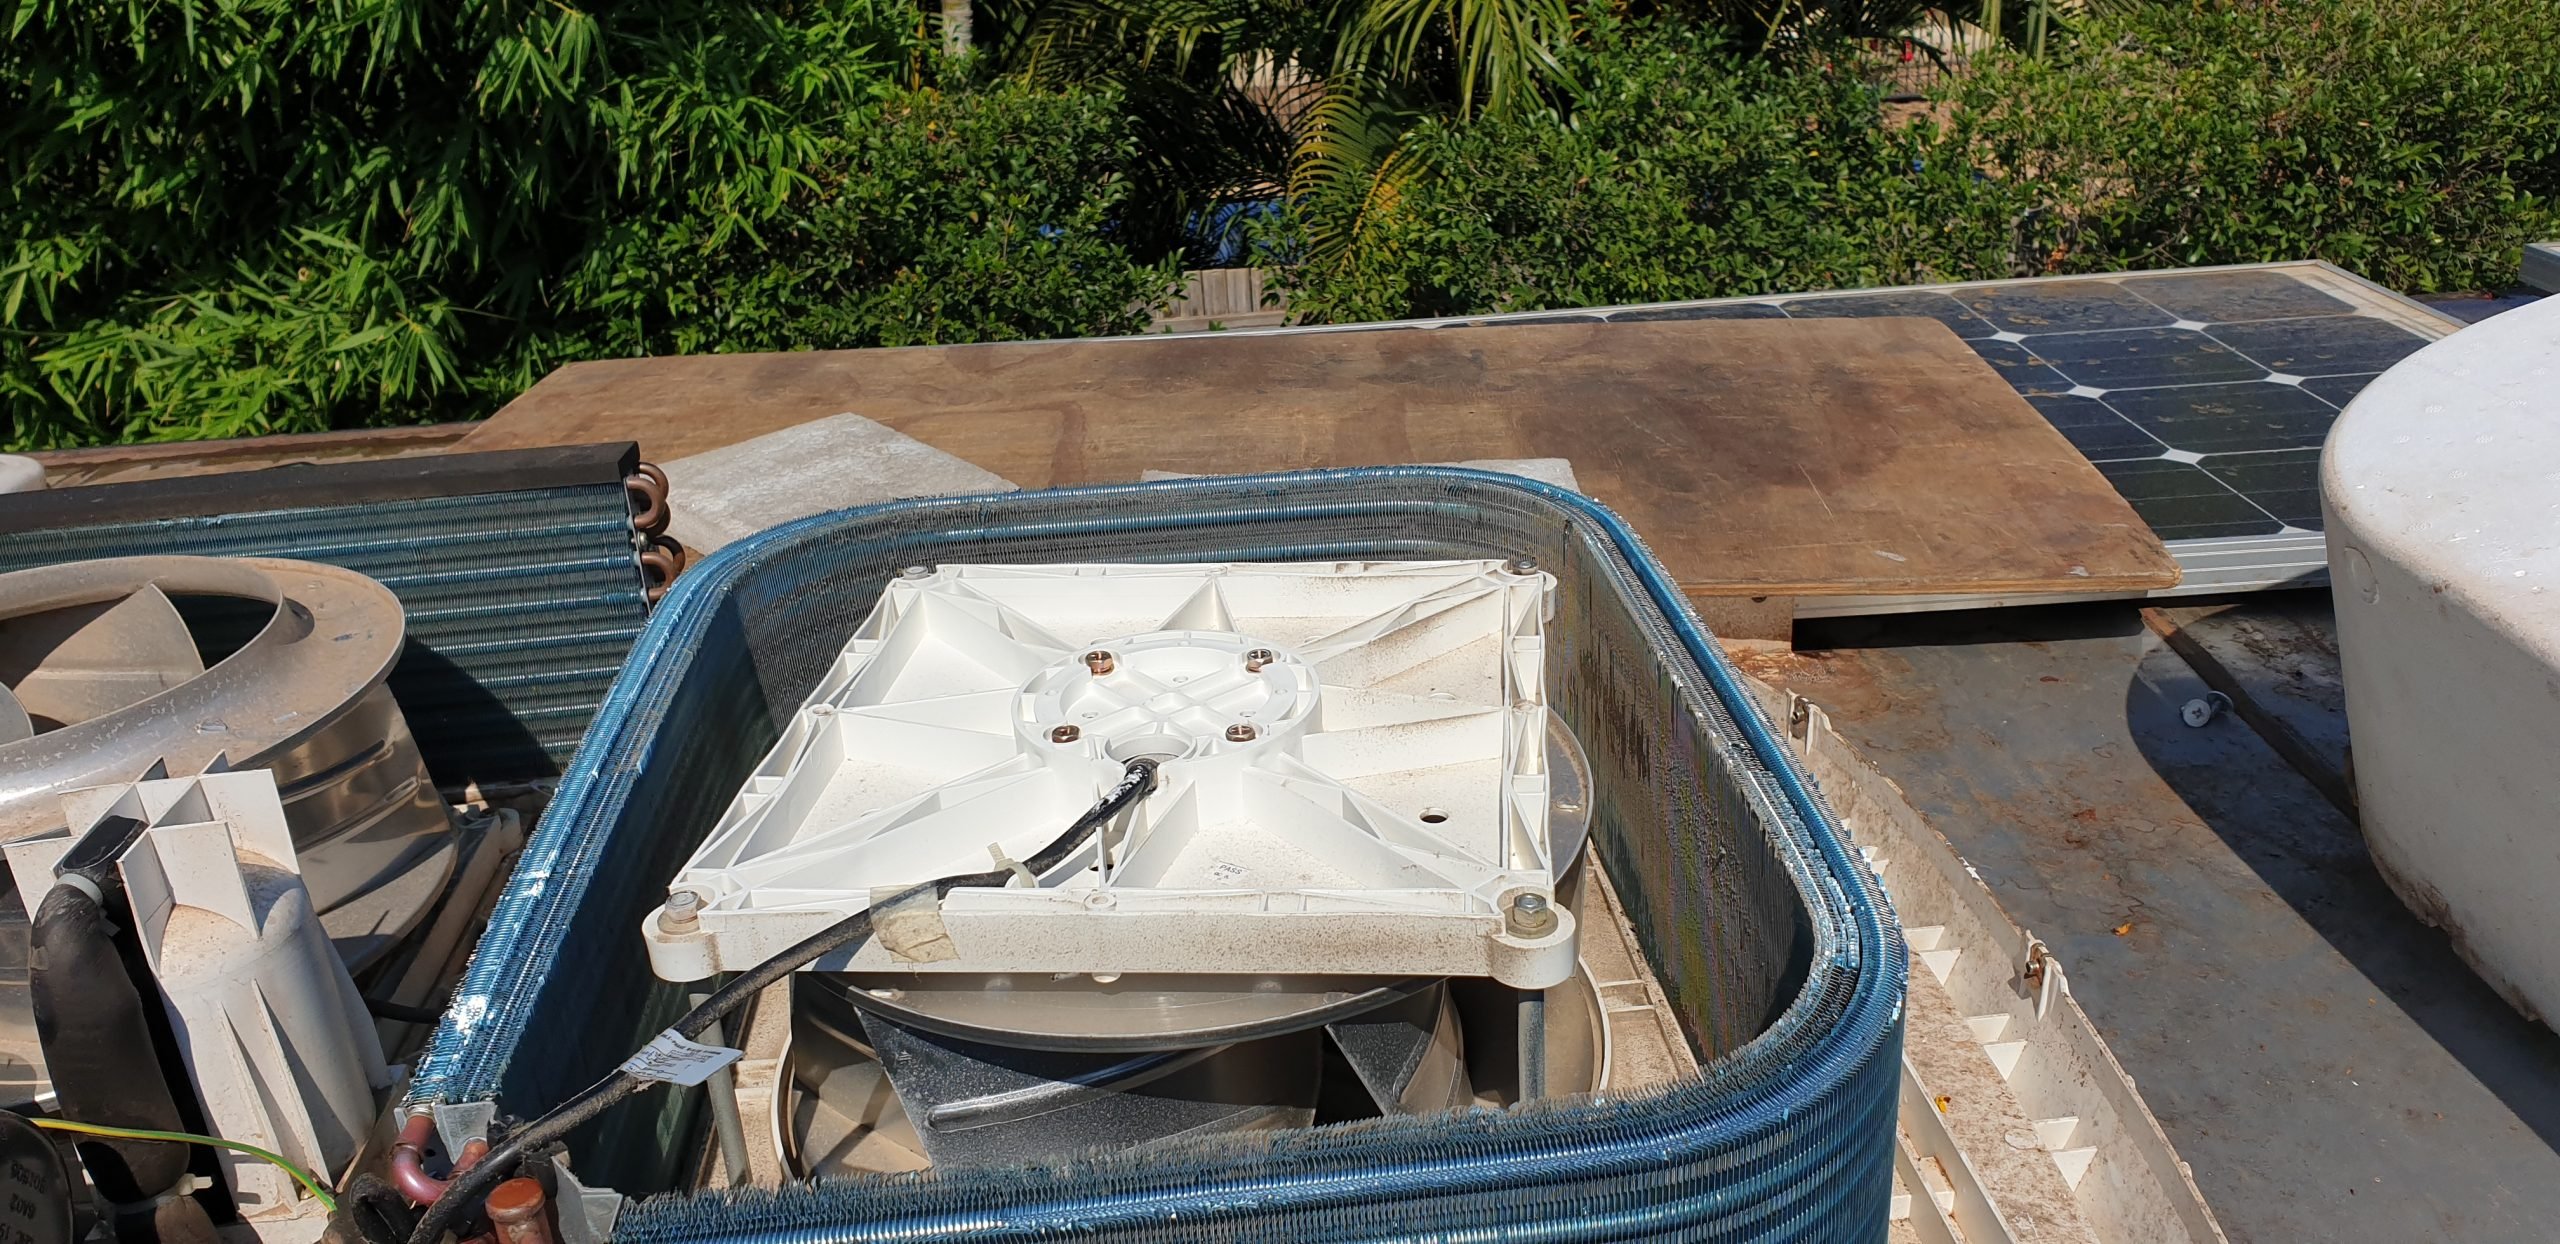
When you remove the main cover from the rooftop unit, you will expose the external fan and heat exchanger radiator. Next to that should be a separate polystyrene cover over a second heat exchanger radiator and another fan. These radiators are made from very thin aluminium, and the fins are placed very close to each other. After a while, dust builds up on these fins and eventually blocks the space between them, preventing the heat exchangers from doing their job and reducing the efficiency of the unit itself.
In our RV air-conditioning unit, both of these radiators had copious amounts of dust caked over the fins, preventing it from working properly. Cleaning these requires a degree of care as it’s very easy to damage them. You can use a gentle brush and a blower tool to remove as much of the dust as possible. If you do damage the fins, you can purchase a special tool that looks and works like a comb. Effectively you use it to bend the fins back into their original shape. It can also be used to remove the dirt between the fins.
In really bad cases, you can purchase air conditioner cleaning kits that use a special chemical sprayed on the coils and washed away with a gentle hose. I tried it on our unit and I didn’t find it all that effective. In fact, it seemed to create more mess than it cleaned up. I reckon if your radiator fins are that badly clogged up, it’s time to get them cleaned by a professional or look at replacement options.
Hot tip: Prevention is way better than cure here. Once you’ve got your radiator fins clean, make it a habit to check them every six months. It’s much easier to blow off a light coating of dust than to deal with years of accumulated gunk. Add it to your van’s service schedule alongside checking tyre pressures.
If you’ve tried all of the above and your RV air-conditioning is still not working properly, chances are the refrigerant gas has either partially or fully leaked out of the cooling system. This is not an easy fix and will require a professional air conditioner service technician.
Here’s the tricky part. Air conditioner service technicians are easy enough to find throughout Australia, especially up north. What was difficult to find was a service technician who was willing to work on an RV rooftop air conditioner. I must have rung around 20 of them in the Townsville area, and all but one said they didn’t touch these systems. I suspect you’ll get that reaction no matter what town you find yourself in.
The one guy who did come out explained to me that in cases where the gas has leaked, regassing these systems is very difficult. Firstly it involves finding the leak and repairing it. Then, the remaining gas needs to be purged and new gas pumped in. Unlike a car air conditioner, these rooftop units seldom have a proper connection for the regas system. Instead, they tend to be sealed by the copper pipe being bent back onto itself. Very few technicians will attempt to regas these systems, and those that do are unlikely to offer more than a three-month guarantee.
In our case, this appeared to be the cause of our RV air-conditioning not working. The heat exchanger radiators had been subjected to constant vibration from the van travelling on the roads and, most likely worsened by our extensive dirt road travels. We had no choice but to purchase a new air conditioning unit.
Hot tip: When shopping for a replacement unit, consider modern inverter models like the Dometic FreshJet 7 Series. They use soft-start technology that draws less power on startup, making them perfect for generator or battery systems. If you’ve got a pop-top or weight restrictions, check out the Truma Saphir Comfort underbunk system – it’s compact but surprisingly powerful.
The moral of this tale is that you must have your rooftop air conditioning unit checked, cleaned and maintained on a regular basis to keep it in good working order. I would recommend once every two years at the very least, even if you don’t use it all that often. The dirt and dust will accumulate even with the van sitting in storage and it will eventually lead to more problems. If you travel off-road or you live in your caravan for extended periods, you may need to look at more frequent servicing. Trust me when I tell you it’s no fun being stuck in the tropics, in 38-degree heat and stifling humidity, without a functioning air conditioner.
Hot tip: Create a simple maintenance schedule and stick to it. I now check and clean our internal filters weekly during summer, give the rooftop unit a visual inspection monthly, and do a full deep clean (including those drain holes and radiator fins) every six months. It takes maybe two hours twice a year, but it’s saved us from another complete failure. Plus, the unit runs more efficiently and uses less power – which is a bonus when you’re running off batteries and solar.
Summer’s here, and your RV air-conditioning is about to work harder than it has all year. Give it the attention it deserves now, and it’ll keep you comfortable through the hottest months. If you do find yourself needing spare parts or a new unit, you know where to look.
This article contains affiliate links. When you buy through these links, RV Daily may earn a small commission. It doesn’t change the price you pay, and it helps us keep producing practical tips, guides, and inspiration for RV travellers at no cost to you.


